SQL Server 2012/2014 AlwaysOn Availability Groups:
- Article Summary
- Part 1 – AlwaysOn Introduction
- Part 2 – AlwaysOn Design
- Part 3 – Install and Configure Windows Server 2012 R2 in Core mode
- Part 4 – WSFC Cluster Creation
- Part 5 – Install SQL Core on Windows Core Server
- Part 6 – AlwaysOn Availability Groups Creation
- Part 7 – AlwaysOn Availability Groups Creation (Advanced, with dedicated Replication Network)
- Part 8 – Methods to add Database on Availability Groups (SCOM Example)
- Part 9 – AlwaysOn Availability Groups – PowerShell Monitoring
- ANNEX (Part 6/7) – Manage SQL Endpoint
Now the next step is to create and configure the first Availability Groups.
There are three methods to do this:
- – with Wizard (through Management Studio)
- – with PowerShell
- – with Transact-SQL
I will use the Wizard to create the first two groups (this permit to create also the Transact-SQL scripts that we can reuse later).
Prepare a Database
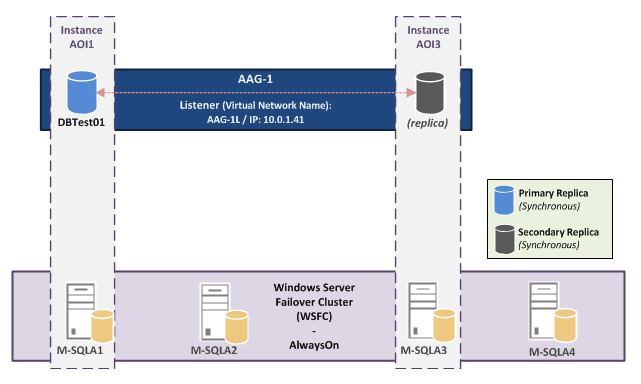
For reminder, the first availability group will be named “AAG-1” and replica will be host on instance:
- – M-SQLA1\AOI1
- – M-SQLA3\AOI3
For test I use the Microsoft Adventure Works Database sample. Download “AdventureWorks2012 Data File” (around 200Mb) from: https://msftdbprodsamples.codeplex.com/releases/view/55330
Copy Database file to: G:\MSSQL\AOREPLICA\MSSQL\Data.
I rename it to “AdvWorks1” (I will use same mdf for other tests DB)

Add database to first instance (M-SQLA1\AOI1):
There is only MDF file. So in order to build a new log file, use the ATTACH_REBUILD_LOG option when attaching the databases.
USE [master]
GO

CREATE DATABASE [AdvWorks1]
ON (FILENAME = N'G:\MSSQL\AOREPLICA\Data\AdvWorks1.mdf')
FOR ATTACH_REBUILD_LOG
GO

SELECT
DB_NAME(database_id)  AS "Database Name",
type_desc             AS "File Type",
name                  AS "Logical File Name",
physical_name         AS "Physical File",
state_desc            AS "State"
FROM sys.master_files WHERE database_id IN (DB_ID('AdvWorks1'));

Check Backup mode of DB:

Another prerequisite is that you have to do at least 1 full backup of each database that will be part of your AG:
# Make a Full Backup
$db = "AdvWorks1"
Backup-SqlDatabase -ServerInstance "M-SQLA1\AOI1" -Database $db -BackupAction Database -BackupFile "G:\MSSQL\MSSQL11.AOI1\MSSQL\Backup\$($db).bak"
Or from SQL:
-- Make a Full Backup
USE master
GO
BACKUP DATABASE AdvWorks1 TO DISK = 'G:\MSSQL\MSSQL11.AOI1\MSSQL\Backup\AdvWorks1.bak'
GO

So now Database is ready with a full backup.
Mirroring Endpoints – Note
The first step is to create one Mirroring Endpoint per Instance.
For reminder, I have prepared a dedicate network for SQL Instances Communications: VLAN Replication. For tests I will configure two instances “AOI2” and “AOI4” to use this Network and the two other to the default network (Public):
| Hostname | IP VLAN Public | IP VLAN CLUSTER | IP VLAN Replication |
| M-SQLA1 | 10.0.1.21 | 10.0.10.21 | n/a |
| M-SQLA2 | 10.0.1.22 | 10.0.10.22 | 10.0.20.22 |
| M-SQLA3 | 10.0.1.23 | 10.0.10.23 | n/a |
| M-SQLA4 | 10.0.1.24 | 10.0.10.24 | 10.0.20.24 |
Explications:
By default the Wizard create automatically a Mirroring Endpoint for each Instance (The Endpoint configuration doesn’t contains any Network parameter) and configure the Replica Endpoint URL with the server FQDN. Example: TCP://M-SQLA1.lab1.ad:5022.
With this configuration the Instance communication will be done over the “Public” Network”
This part will be done for the AAG-1 and the AAG-2 (Instance AOI1 and AOI3).
To configure instance for communicate over the Replication Network, we have to create the Endpoint and specify an IP address of the replication network for each instance and configure the Endpoint URL with this IP for each Replica.
This part will be done for the AAG-3 and the AAG-4 (Instance AOI2 and AOI4).
For reminder, there is only one Endpoint per Instance (can be used for multiple Availability Group).
Create AAG-1 (Instance AOI1 & AOI3)
Ok, now I create the first AAG (DBTest01 is the AdvWorks1 database added before)
From M-SQLA1, start Management Studio, connect to instance AOI1.
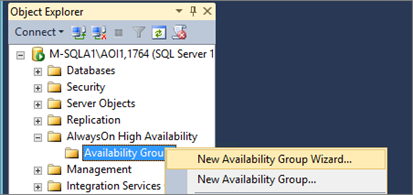
Right-click on “Availability Group” and select “New Availability Group Wizard”:
Specify the AAG name (this will be the WSFC Resource Group name):

Select the DB:

Select “Add replica”
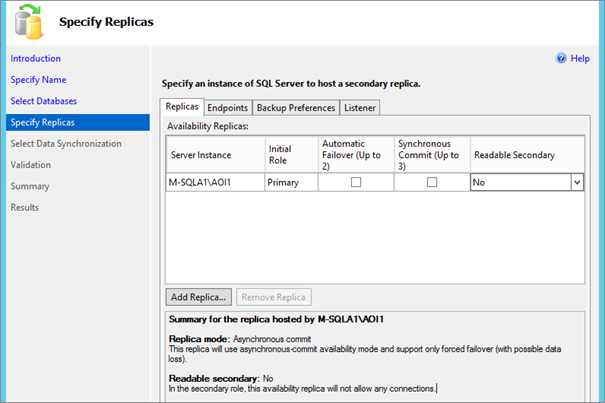
Connect to the AOI3 instance:

Enable “Automatic Failover” (Synchronous Commit must be enabled) and configure the “Readable Secondary Option” (For more information about parameters see chapter “Availability Replicas Configuration” in “Part 2 – AlwaysOn – Lab Design“)
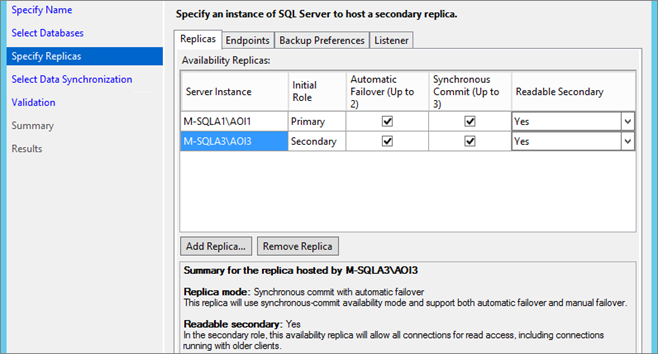
Configure Endpoints (Default URL = Server FQDN => Communication on the Public network):

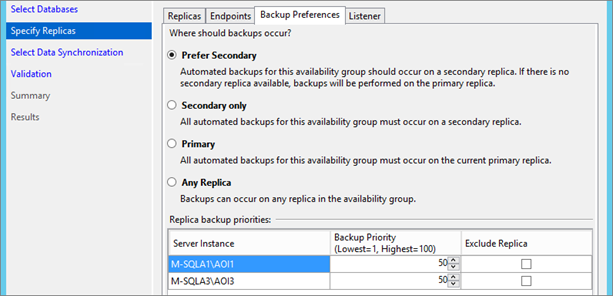
Configure “Backup Preferences” (this is the default option):
Create the Listener:
(When you configure later applications to host their Databases in the AAG you have to specify this Listener DNS Name and the Port, this is the only information known by applications).
Note: The Listener VCO and DNS record must be prestage (see chapter “Prestage – Availability Group Listener” in article “Part 6 – Create AAG“)
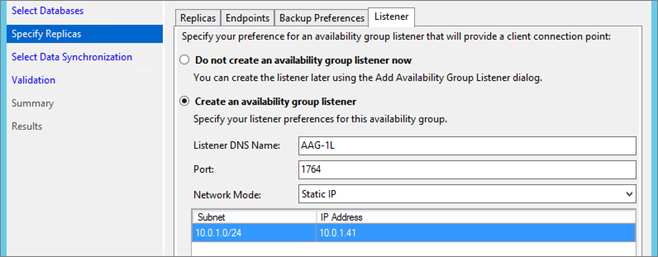
Select “Full” for the initial data synchronizatrion:
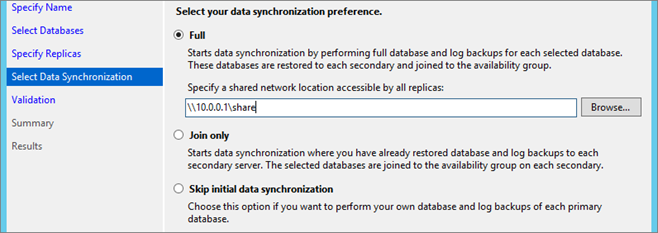
Note: If the default Database paths (file and log) are not the same on all instances, the Full mode will not work.
For more information see paragraph “Note for Databases/Logs path on AAG” in the chapter “Storage” on “Part 2 – AlwaysOn – Lab Design”
More information on Data Synchronization Page:
Select Initial Data Synchronization Page (AlwaysOn Availability Group Wizards)
https://msdn.microsoft.com/en-us/library/hh231021.aspx
Manually Prepare a Secondary Database for an Availability Group (SQL Server)
https://msdn.microsoft.com/en-us/library/ff878349.aspx

Click on “Script” and save it and start the creation:
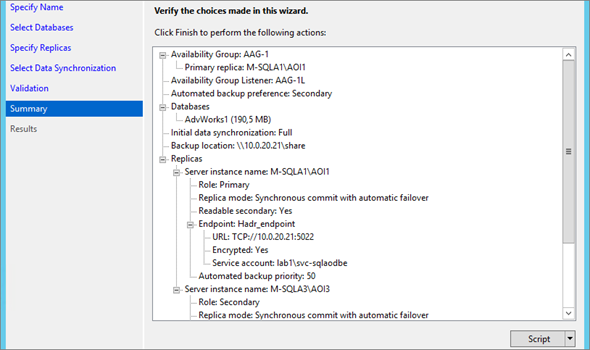
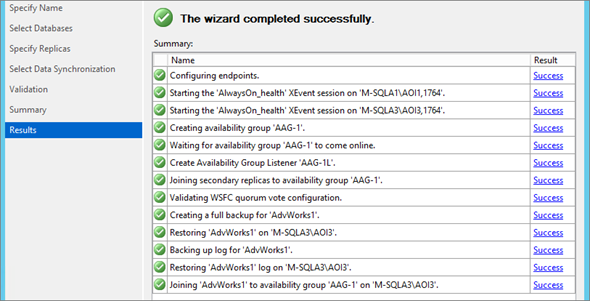
Check AAG
Now you can start the Dashboard to check the Status of AAG:

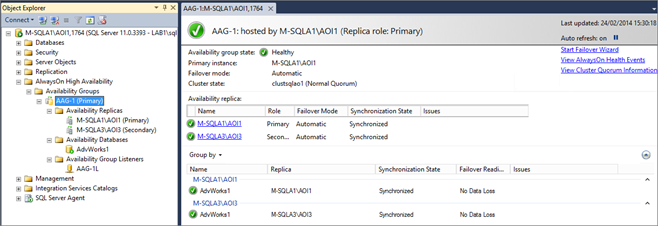
Note: Requires Permissions to use Dashboard:
- – CONNECT
- – VIEW SERVER STATE
- – VIEW ANY DEFINITION
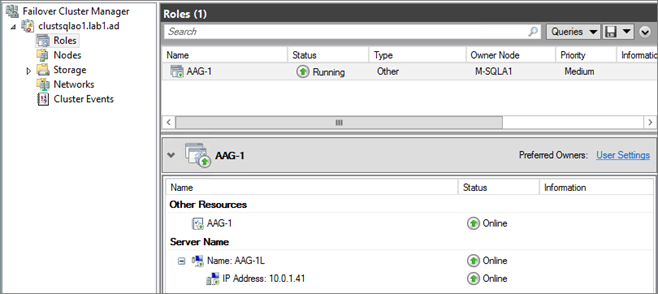
And via the WSFC Console, you can show the availability group resource group status:
Note: Normally you should not use the WSFC Console to administer AlwaysOn Availability Groups. Everything (failover …) must be done via the Dashboard, Transact-SQL or PowerShell. The WSFC Console provides a view of the cluster state.
Create AAG-2 (Instance AOI1 & AOI3)
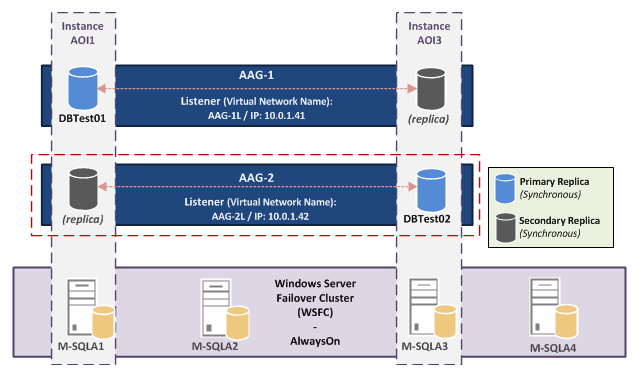
So now I will create the second Availability Group (on the same node as AAG-1).
At the end, there will be an active database on each instance with a replica on each other side. So the loss of an instance will be supported.
From Instance M-SQLA3\AOI3
Create a test DB with one table:
-- CREATE DATABASE DBTestAOI3 --------------------------------------------------------------
USE master;
GO
CREATE DATABASE DBTestAOI3
ON
( NAME = DBTestAOI3_Data,
FILENAME = 'G:\MSSQL\AOREPLICA\Data\DBTestAOI3.mdf',
SIZE = 10MB,
MAXSIZE = 500MB,
FILEGROWTH = 1MB )
LOG ON
( NAME = DBTestAOI3_Log,
FILENAME = 'L:\MSSQL\AOREPLICA\Log\DBTestAOI3_log.ldf',
SIZE = 5MB,
MAXSIZE = 25MB,
FILEGROWTH = 5MB ) ;
GO

USE DBTestAOI3
GO

CREATE TABLE Servers (SrvID int IDENTITY (100,1) PRIMARY KEY, Name nvarchar (50))
GO
-- Populate Table
INSERT INTO Servers ([Name]) VALUES ('ServerAOI3-01')
INSERT INTO Servers ([Name]) VALUES ('ServerAOI3-02')
INSERT INTO Servers ([Name]) VALUES ('ServerAOI3-03')
GO

select * from servers
Do a full backup:
-- MAKE A FULL BACKUP -----------------------------------------------------------------------
USE master
GO
BACKUP DATABASE DBTestAOI3 TO DISK = 'G:\MSSQL\MSSQL11.AOI3\MSSQL\Backup\DBTestAOI3.bak'
GO
Create the AAG-2
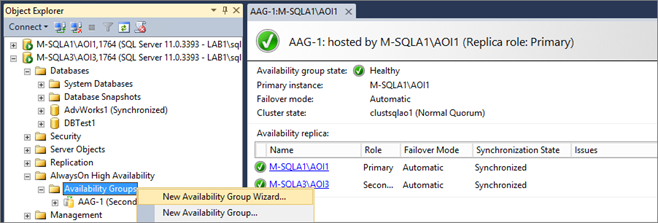
Enter AAG name:

Select the database:

Add the replica M-SQLA1\AOI1

Note that you cannot change the name or port of Endpoints (there was previously created with the first AAG):

Configure Backup Preferences:

Configure the Listener:
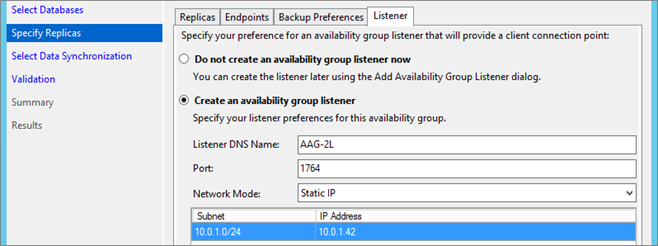
Select Initial synchronization option:

Start the Availability Grou pcreation :
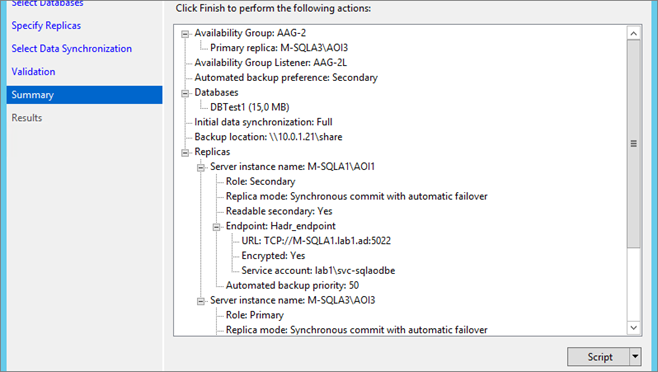
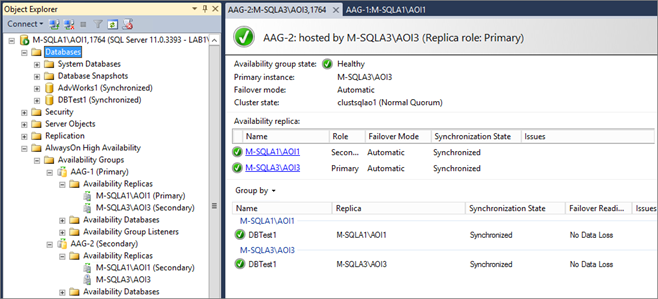
So now, the two AAG are created:
Network Note:
We can see that the Instances communications are established on the Public Network (10.0.1.0), this is due to the endpoints configuration:

Share Note:
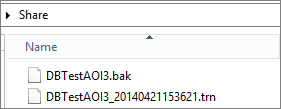
The network share specify in the “Initial synchronization” page contains backup of Databases added to the AG. These backups can be removed, there are used only for the initial replica creation.
