SQL Server 2012/2014 AlwaysOn Availability Groups:
- Article Summary
- Part 1 – AlwaysOn Introduction
- Part 2 – AlwaysOn Design
- Part 3 – Install and Configure Windows Server 2012 R2 in Core mode
- Part 4 – WSFC Cluster Creation
- Part 5 – Install SQL Core on Windows Core Server
- Part 6 – AlwaysOn Availability Groups Creation
- Part 7 – AlwaysOn Availability Groups Creation (Advanced, with dedicated Replication Network)
- Part 8 – Methods to add Database on Availability Groups (SCOM Example)
- Part 9 – AlwaysOn Availability Groups – PowerShell Monitoring
- ANNEX (Part 6/7) – Manage SQL Endpoint
This part covers the installation and configuration of Windows Server 2012 R2 Core.
Virtual Machine
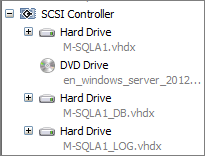
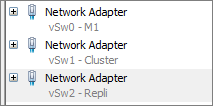
Create the four SQL Servers and configure the three Network adapters and the three Virtual disks:
AD Account
Create Group:
- lab1\SQLAlwaysOnAdmins
Create accounts:
- lab1\sqlaoinstall
Add your account and sqlaoinstall account to SQLAlwaysOnAdmins Group. This is not mandatory but I recommend using an “Install account” for environments installation.

Server Installation – 1st Node
Install and Configure a WS2012 R2 Server
Server: M-SQLA1
- Install WS2012R2 (in full GUI mode). For reminder this server will be used for management (consoles, …)
- Configure Network
Note about IPv6 for WSFC Cluster
For Cluster network you can disable IPv6 protocol, but by default the heartbeat mechanism prefer use first IPv6 addresses. Now on WS2012, it’s not recommended to disable IPv6.
Note for Cluster and Replication NIC
Disable “Register this connection’s addresses in DNS”
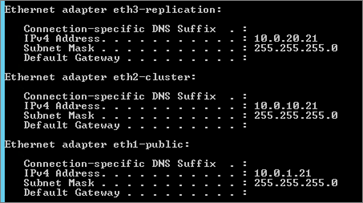
- Configuration: Do the same configuration as the Core server bellow.
Core Server Installation – Three other Nodes
Servers: M-SQLA2, M-SQLA3, M-SQLA4
Install and Configure a Windows Server 2012 R2 Core Server

Configure all Nodes
All commands bellow are in the script: “WSCoreNode-Configuration.ps1.“
Configure Network
List NIC:

Identify NIC, retrieve MAC address from Hyper-V:
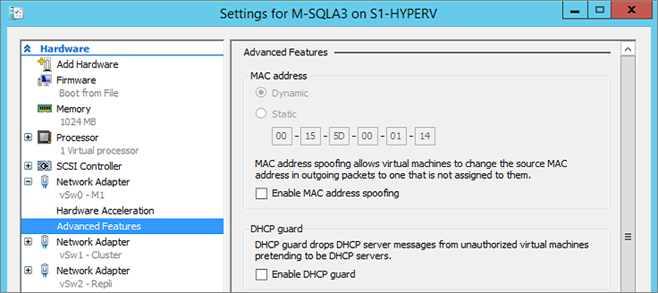
Rename Network Adapter
Rename-NetAdapter -Name "Ethernet" -NewName "eth1-public"
Repeat operation for “Ethernet 2” and “Ethernet 3”:

Set IP Address
Note: Option -Gateway <IP>new
New-NetIPAddress -InterfaceAlias "eth1-public" -IPAddress 10.0.1.24 -PrefixLenght 24

Repeat Operation for “eth2-cluster” and “eth3-replication” NICs:
# NIC Cluster
New-NetIPAddress -InterfaceAlias "eth2-cluster" -IPAddress 10.0.10.24 -PrefixLenght 24
#NIC Replication
New-NetIPAddress -InterfaceAlias "eth3-replication" -IPAddress 10.0.20.24 -PrefixLenght 24
Set DNS

To set multiple DNS: “-ServerAddresses 10.0.1.1, 10.0.1.2”
Configure Protocols
Retrieve Protocol status:
Get-NetAdapterBinding -InterfaceAlias "eth1-public"

NIC “eth1-public”:
I disable “Link-Layer Topology …” and “IPv6” protocols.
Disable-NetAdapterBinding -InterfaceAlias "eth1-public" -ComponentID ms_rspndr, ms_lltdio, ms_tcpip6

Repeat Operation for “eth2-cluster”:
Disable “Link-Layer Topology …” and “QoS” protocols.
Disable-NetAdapterBinding -InterfaceAlias "eth2-cluster" -ComponentID ms_rspndr, ms_lltdio, ms_pacer
Repeat Operation for “eth3-creplication”:
Disable “Link-Layer Topology …”, “QoS”, and “IPv6” protocols.
Disable-NetAdapterBinding -InterfaceAlias "eth3-replication" -ComponentID ms_rspndr, ms_lltdio, ms_pacer, ms_tcpip6
Enable Remote Desktop
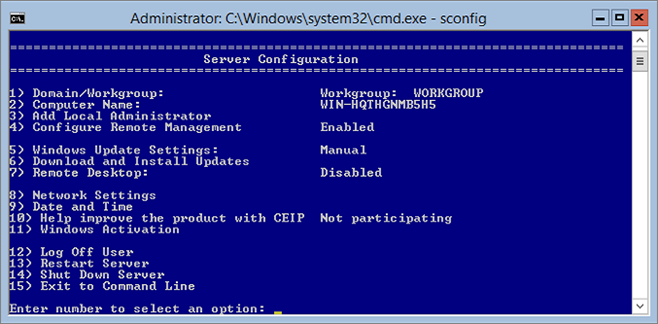
Method 1 – From SCONFIG
Go to “7”:
Method 2 – From PowerShell
Enable Remote Desktop:
Set-ItemProperty -Path 'HKLM:\System\CurrentControlSet\Control\Terminal Server'-name "fDenyTSConnections" -Value 0
Enable Secure Connections:
set-ItemProperty -Path 'HKLM:\System\CurrentControlSet\Control\Terminal Server\WinStations\RDP-Tcp' -name "UserAuthentication" -Value 1
Enable Firewall Exception:
Enable-NetFirewallRule -DisplayGroup "Remote Desktop"
Check:
Get-ItemProperty -Path 'HKLM:\System\CurrentControlSet\Control\Terminal Server'-name "fDenyTSConnections"
Get-ItemProperty -Path 'HKLM:\System\CurrentControlSet\Control\Terminal Server\WinStations\RDP-Tcp' -name "UserAuthentication"
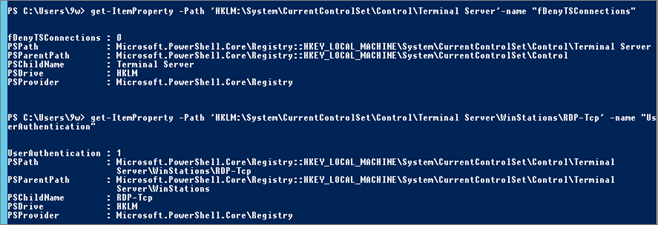
Check Firewall:
Get-NetFirewallRule -DisplayGroup "Remote Desktop" | ft displaygroup,displayname,enabled,profile -AutoSize

Configure Firewall
This configuration can be done (and it’s better) though AD GPO. Commands bellows are for information or for lab environment.
Enable Firewall Remote Management
Show CurrentProfile:
netsh advfirewall show currentprofile settings
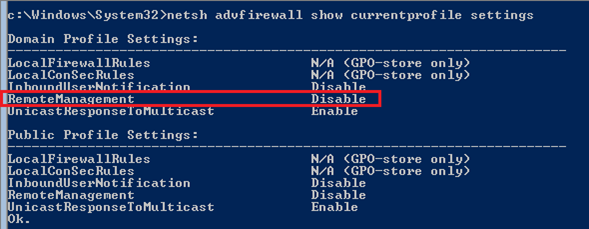
Enable Remote Management:
netsh advfirewall set domainprofile settings remotemanagement enable

This enables rules:

| NOTE | To disable Remote Management (netsh) |
| netsh advfirewall set currentprofile settings remotemanagement disable | |
Enable Remote Management Rules
I use script “FW_Enable-GroupRules-RM.ps1” to enable this rules:
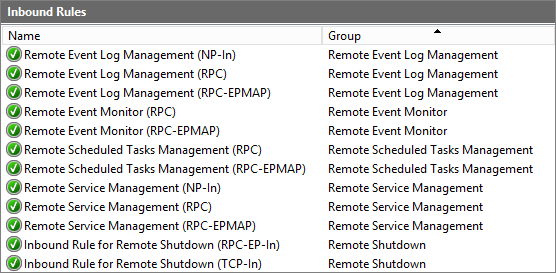
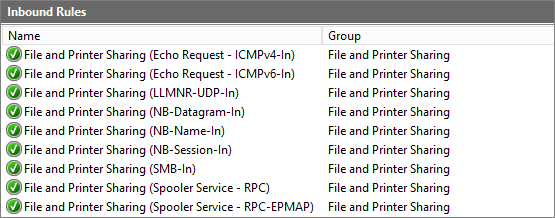
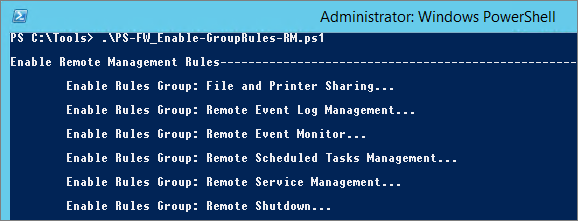
| NOTE | Enable Remote Management rules (netsh/powershell) |
|
Set-NetFirewallRule -DisplayGroup “Remote Service Management” –Enabled True -Profile “Domain,Private” Or via netsh netsh advfirewall firewall set rule group=”Remote Shutdown” new enable=yes
Check the Remote Management Rules: Get-NetFirewallRule -DisplayGroup “Remote *” | ft displaygroup,displayname,enabled,profile -AutoSize |
|
Create Firewall Rules for SQL
You have to create these inbound rules:
| Protocol | Port | Name | Note |
| TCP |
1764 |
Instance and VNN Port | |
| TCP |
5022 |
Instance SQL Endpoint | User for AAG communication |
Script: FW-Create-Rules-AOLab.ps1
Script overview:
#SQL Server Firewall RULES
#VAR
$Profile = “Domain,Private”
$RuleGroup = “SQL”

#Rule: INBOUND – Allow Instance/VNN Port
$RuleName = “SQL Database Engine – Instance/VNN (TCP 1764)”
$LocalPort = 1764
$Protocol = “TCP”
$Action = “Allow”
New-NetFirewallRule -Group $RuleGroup -DisplayName $RuleName -Direction Inbound -Protocol $Protocol -LocalPort $LocalPort -Action $Action -Profile $Profile | out-null

# ...


Other SQL Ports:
| Protocol | Port | Name | Note |
| UDP |
1434 |
SQL Browser Service | Browser Service listens for incoming connections to a named instance and provides the client the TCP port number that corresponds to that named instance. |
Browser will be disabled.
For more information (other port for SSRS, AS …) see TechNet article “Configure the Windows Firewall to Allow SQL Server Access“: https://msdn.microsoft.com/en-us/library/cc646023.aspx
Join Server to Domain
Rename-Computer -NewName xxxx

Add-Computer -DomainName domain.local -DomainCredential (Get-Credential)

Restart-Computer

Add account to Local Administrators Group
| Add AD Group to local Administrators group: |
CMD |
| net localgroup administrators /add lab1\SQLAlwaysOnAdmins List members of a Local Group: net localgroup administrators |
|

Or via PowerShell:
|
PowerShell |
|
|
#Add an account/group: ([ADSI]“WinNT://localhost/Administrators,group”).psbase.Invoke(“Add”,([ADSI]“WinNT://lab1/SQLAdmins”).path) #Remove an account/group: ([ADSI]“WinNT://localhost/Administrators,group”).psbase.Invoke(“Remove”,([ADSI]“WinNT://lab1/SQLAdmins”).path) |
|
Add Route (optional)
I need route for RDP, this is the netsh command:
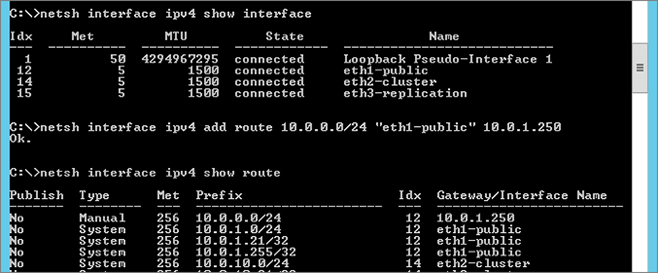
[Note] Remote Management
Now, we can remotely manage the server with consoles from another Server in Full-GUI mode.
Commands bellows are for information.
Configure DVD-Drive Letter
View the CD/DVD Drive Letter:
Get-WmiObject -Class Win32_CDROMDrive

Change Drive Letter:
(gwmi Win32_cdromdrive).drive | %{$a = mountvol $_ /l;mountvol $_ /d;$a = $a.Trim();mountvol v: $a}

Warning: This method function if there is only one CD/DVD Drive.
Configure update
Now the core server is joined to domain, I have GPO to set Update mode (Automatic during the night) and WSUS options.
List installed updates
wmic qfe

Force Update:
Copy this script to each core node:
https://msdn.microsoft.com/fr-FR/library/aa387102%28VS.85%29.aspx
And launch it (this script start a Windows Update session):
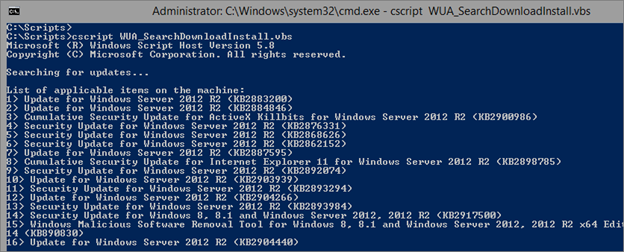

TechNet Resources:
| Configure Automatic Updates by Using Group Policy https://technet.microsoft.com/en-us/library/cc720539%28v=ws.10%29.aspx Servicing a Server Core installation https://technet.microsoft.com/en-us/library/ff698994%28v=ws.10%29.aspx Searching, Downloading, and Installing Updates https://msdn.microsoft.com/en-us/library/aa387102%28v=vs.85%29.aspx#fbid=kpO9Qceh-_Y |
Core Servers deployment done!
[Note] Switch between Full-GUI/Minimal/Core interface
Command for switch between Full-GUI, Minimal, or Core mode
By default on core installation, “Server-Gui-Shell” and “Server-Gui-Mgmt-Infra” features are removed, so you have to specify the source files. To do that retrieve Index on the source WIM:
dism /get-wiminfo /wimfile:”v:\sources\install.wim”
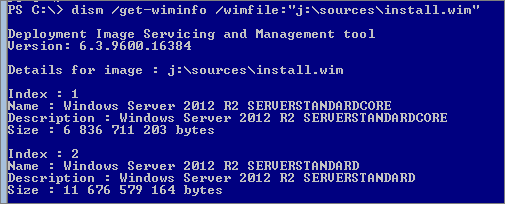
To switch to Minimal interface:
Install-WindowsFeature Server-gui-mgmt-infra -Source wim:v:\sources\install.wim:2

To switch to Full interface:
Install-WindowsFeature Server-Gui-Shell, Server-Gui-Mgmt-Infra -Source wim:v:\sources\install.wim:2
To switch to Core interface:
Remove-WindowsFeature Server-Gui-Shell, Server-Gui-Mgmt-Infra
Note: you can use “-remove” option to delete binary files from local disk.
Manage all nodes from Server M-SQLA1
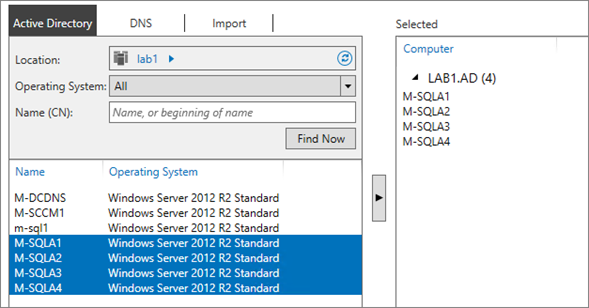
From M-SQLA1 (with full GUI mode), connected with lab1\sqlaoadm account, got to Server Manager and add the three core nodes.
Click “Add other servers to manage”:

Select the 3 other nodes:

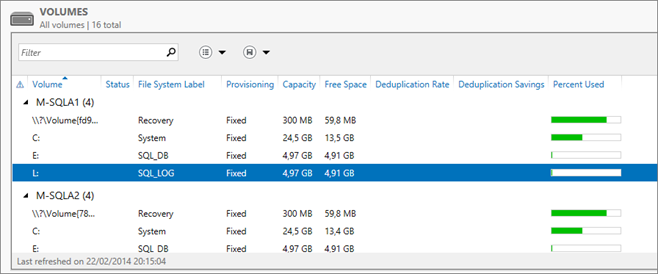
Configure Volume for all nodes:
Note: For AAG the volume letter (for DB and Log) must be the same on all instance that participate to the AAG
If you want to use PowerShell, you can read this great article on Volume Management with PS:
Next
Now all nodes are ready, the next part covers the WSFC Cluster creation: Part 4 – AlwaysOn – WSFC Cluster Creation


