5-Nine Cloud Security is a security solution for Microsoft Cloud OS and Hyper-V. This solution provides an firewall, an antivirus and an IDS (Intrusion Detection System) to detect malicious attacks. Cloud Security can secure a multi-tenant Hyper-V environment to protect each tenant VMs and hypervisor. Moreover the Hyper-V hosts are protected with agentless antivirus. 5-Nine Cloud Security can be integrated into the Windows Azure Pack to provide Security as a Service.
In the last topic, I have implemented the 5-Nine Cloud Security in a Windows Azure Pack environment. Now I will configure 5-Nine Cloud Security to work with the Windows Azure Pack.
- Part 1: Implement 5-Nine Cloud Security 5.1
- Part 2: Configure 5-Nine Cloud Security for Windows Azure Pack
- Part 3: Protect tenant VMs
Permissions Management
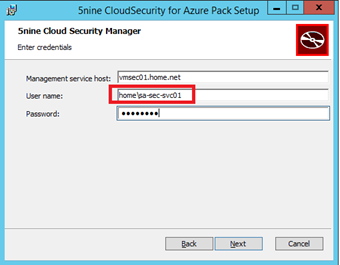
First of all we have to configure the service account with the right permissions. If you don’t configure the service account permissions, the Cloud Security service in the Windows Azure Pack will be Out-Of-Sync. Remember the part 1 of this series. When I have installed the Windows Azure Pack extension, I have used a service account to connect to the Management Service as below. This is this account that I will add to the permissions management.
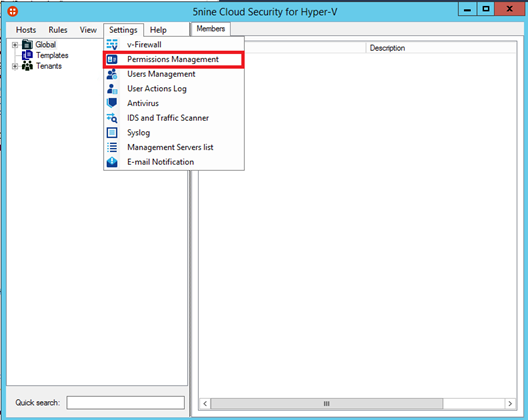
So open a 5-Nine Cloud Security console and click on Settings and select Permissions Management.
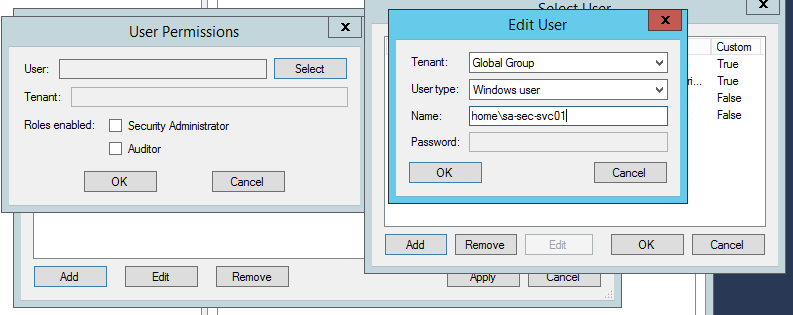
Next click on Add and click on Select. Now select Global Group and Windows User. Then specify the service account (mine is called home\sa-sec-svc01). To finish select the Security Administrator role for this account.
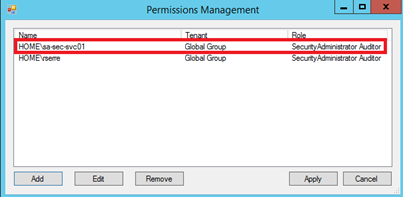
Now in the Permissions Management you should have the service account as below. I have also added my account to manage the solution from the console.
Add Hyper-V hosts to 5-Nine Cloud Security
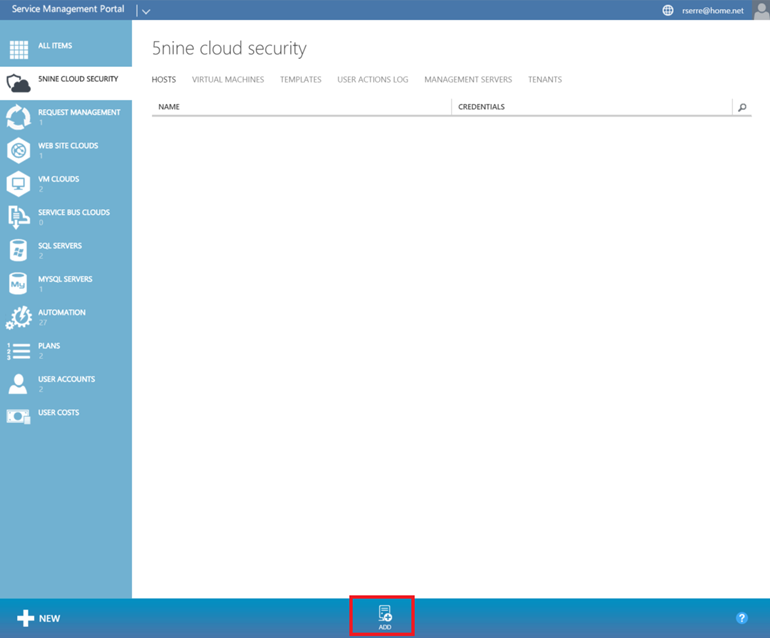
Now that the service account permissions are set, connect to your administrative portal of the Windows Azure Pack. Open the 5-Nine Cloud Security tab. In the Hosts tab, click on add as below.
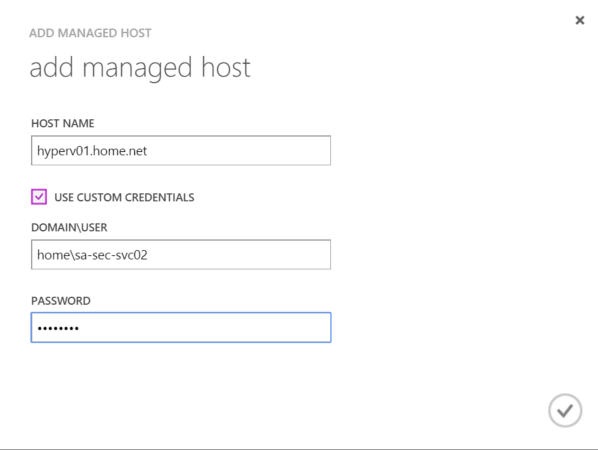
Then specify the host name and if needed, the credential to connect to the Host Management Service. Repeat this operation for each Hyper-V host.
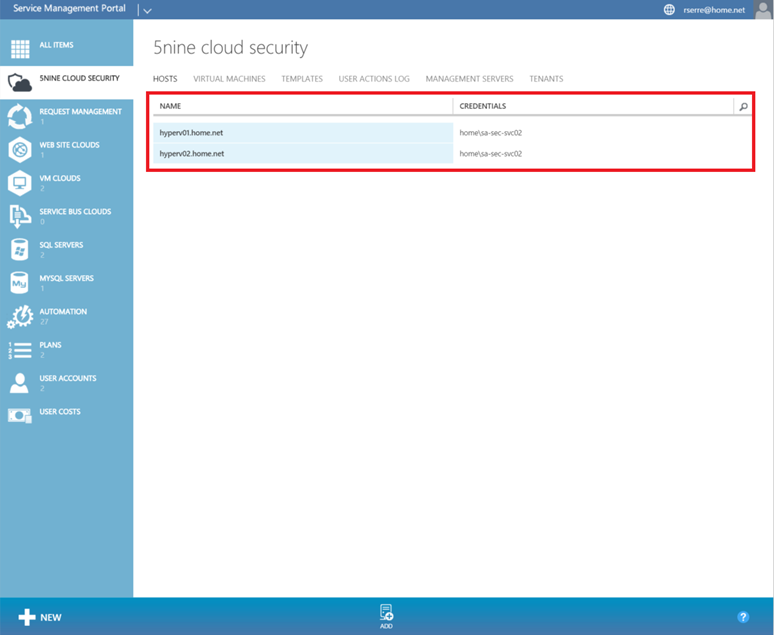
Now your Hyper-V hosts should be listed in the Hosts tab.
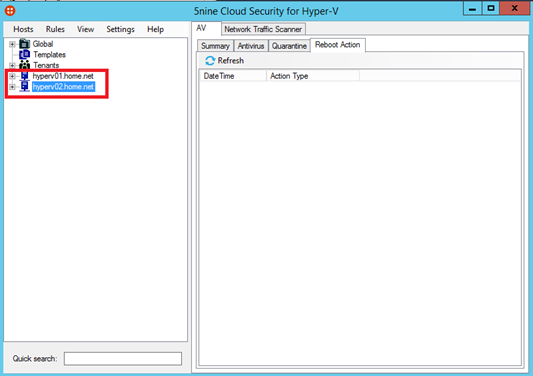
If you come back to the 5-Nine Cloud Security Console, the Hyper-V hosts should be added as below.
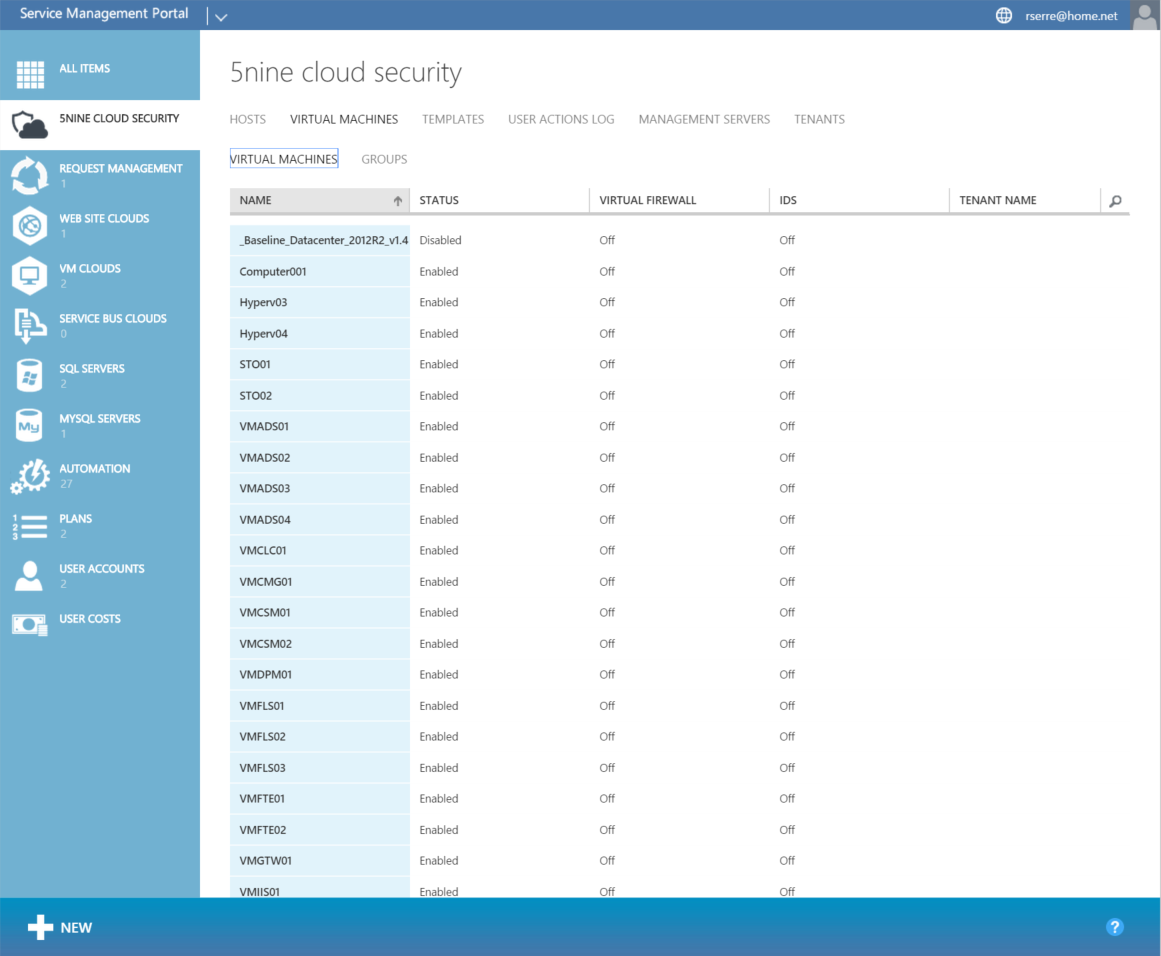
Now you should have all VMs listed in the 5-Nine Cloud Security as below.
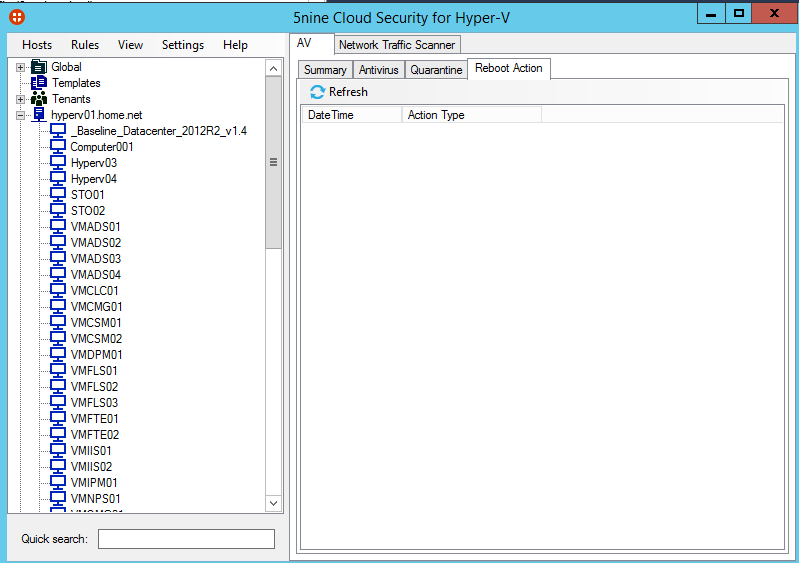
And you have the same result in the 5-Nine Cloud Security console J.
Add the Cloud Security Service to a hosting plan
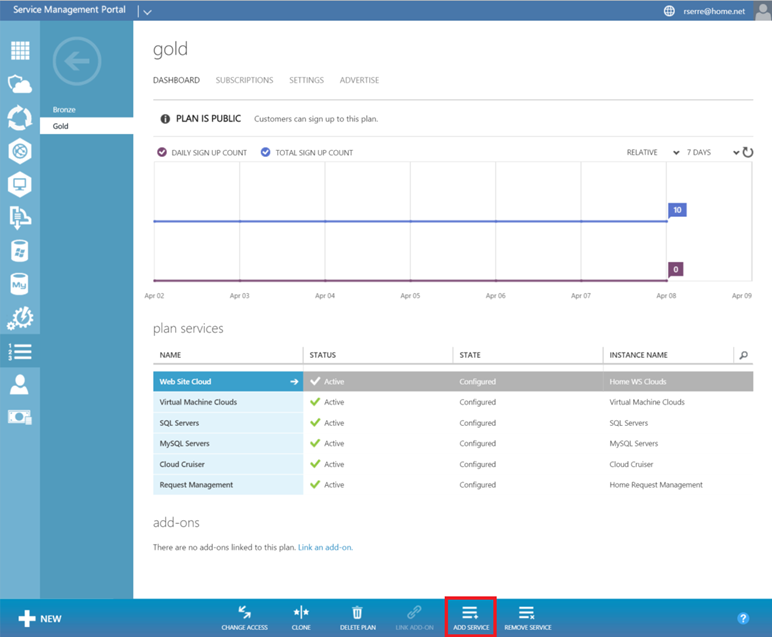
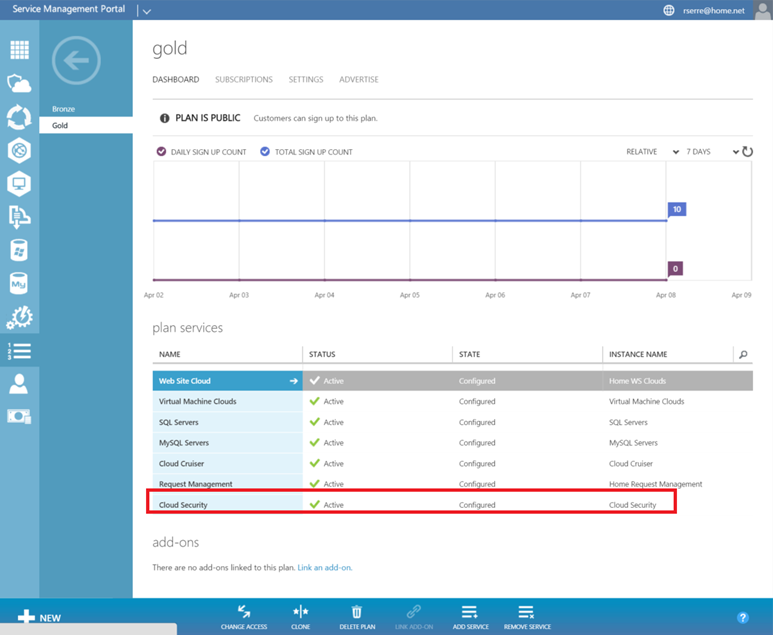
Now we can add the 5-Nine Cloud Security service to a hosting plan. So, navigate to your hosting plan and click on Add Service.
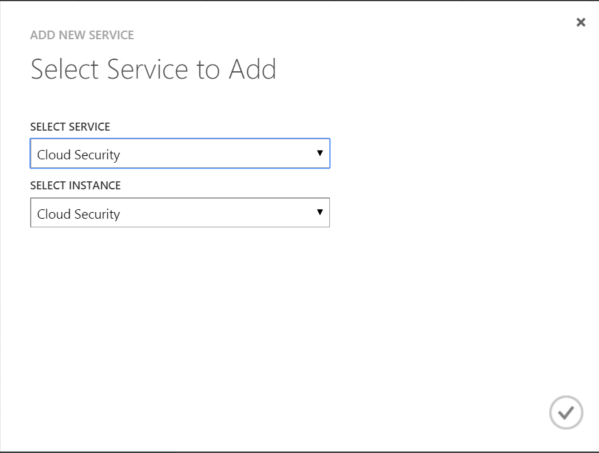
Select the Cloud Security Service and click on validate.
If all is well configured, you should have a new plan service called Cloud Security and Active. If your service is Out-Of-Sync, verify the permissions in 5-Nine Cloud Security console.
Check on the tenant portal
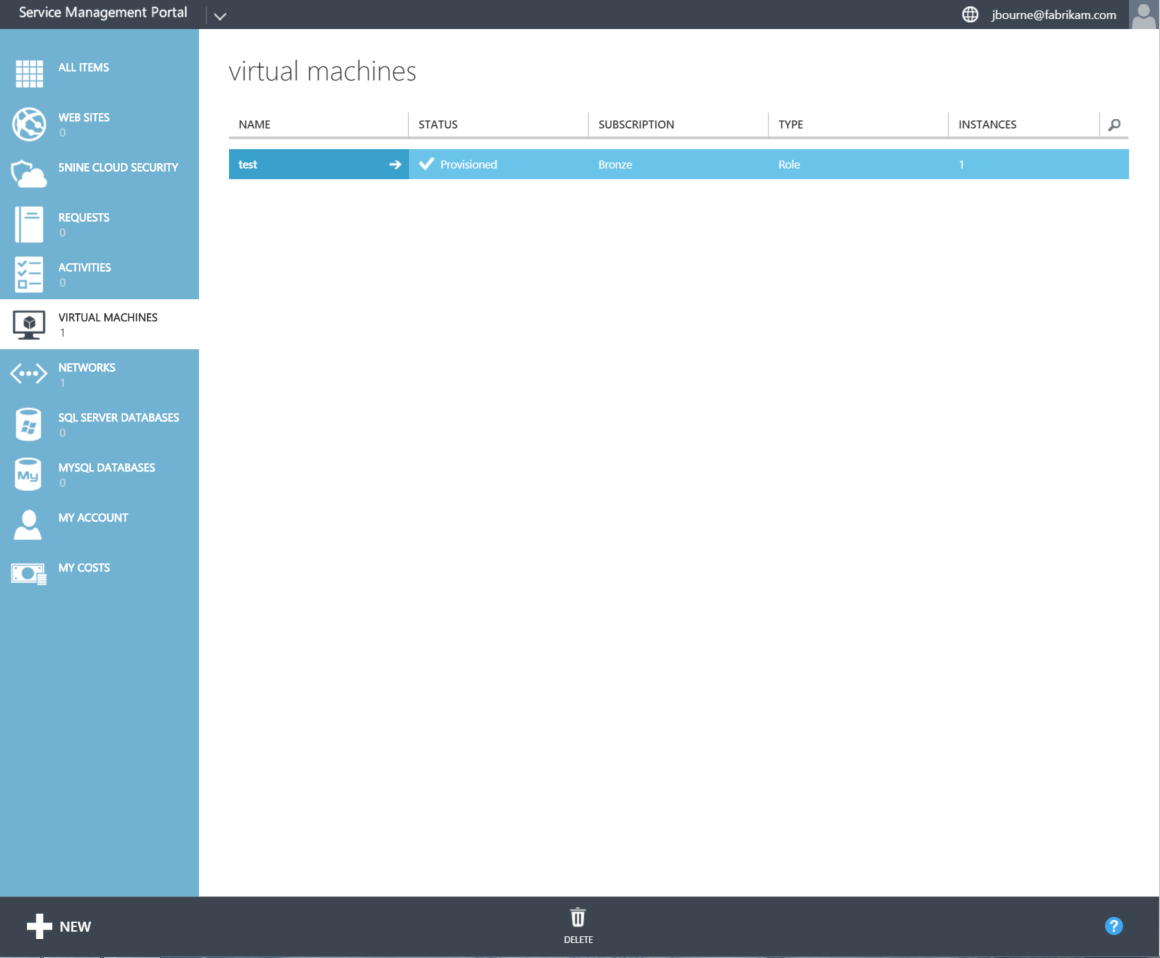
To verify if the tenants can access to the Cloud Security service, I’m connecting to to the tenant portal with Jason Bourne account (fabrikam\jbourne). First be sure that at least one VM is created by the tenant.
Now click on New, select Cloud Security and Add VM.
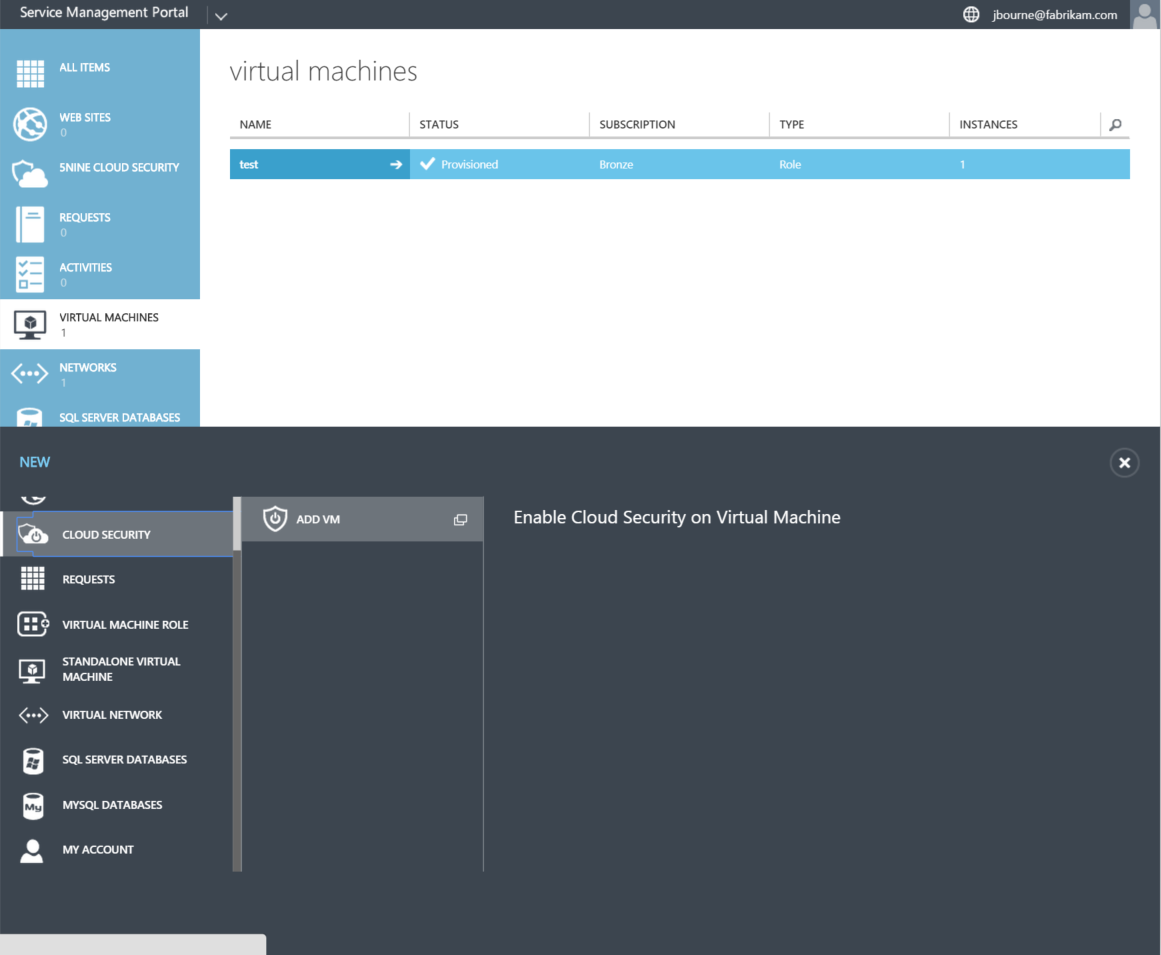
N.B: I have an issue at this moment. When I click on Add VM, the list of virtual machines is empty. Currently I’m asking to 5-Nine support how to resolve this issue. When I have the solution, I will edit this topic. For this example, I have linked the VM to the tenant from the 5-Nine Cloud Security Console.
Select the VM and validate. Now if you navigate to the 5Nine Cloud Security tab, you should have your VM listed.
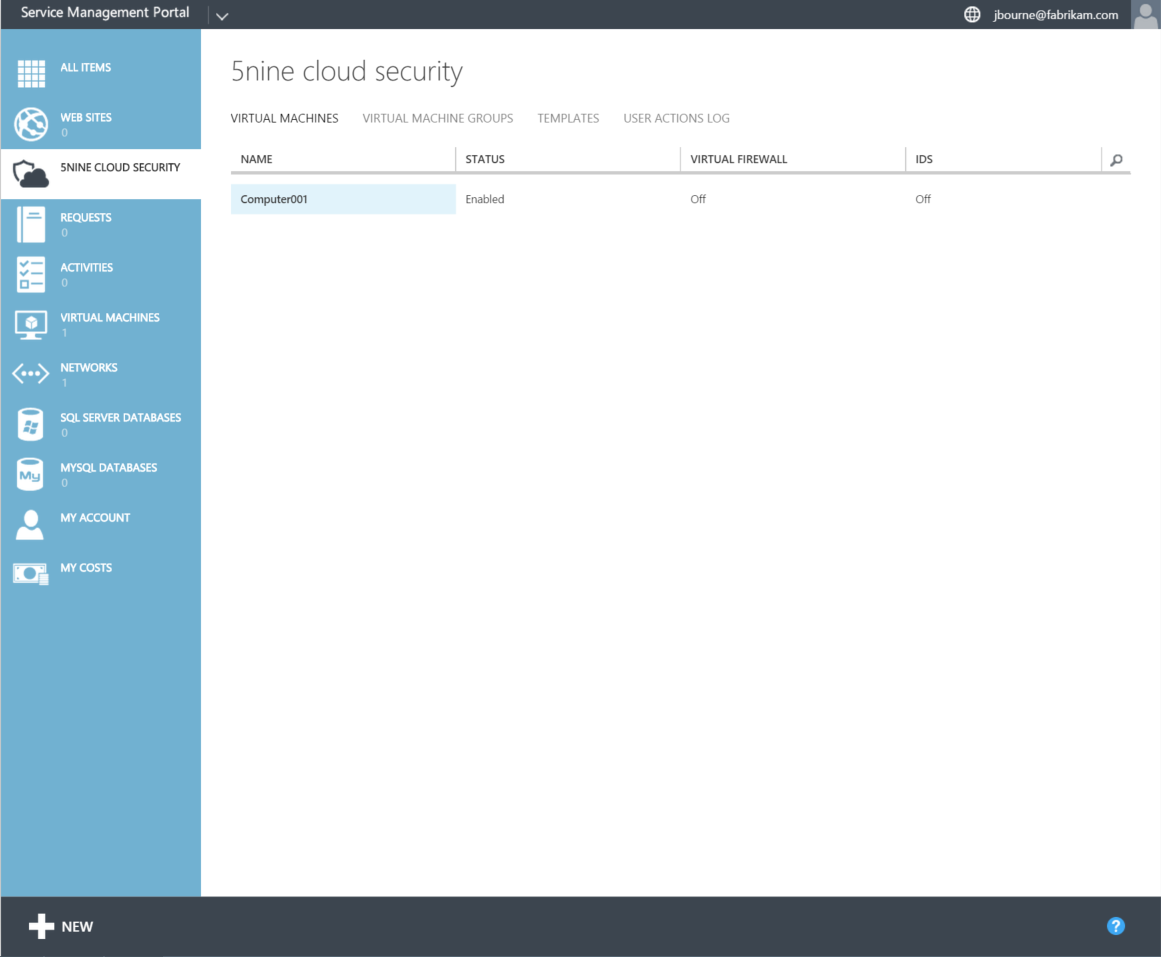
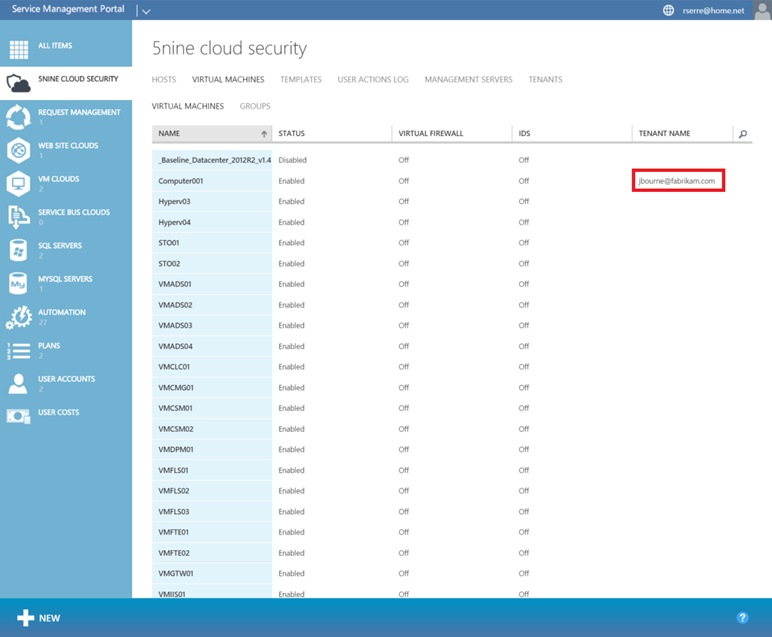
If I come back to the admin portal, I have the tenant associated to the Virtual Machine.
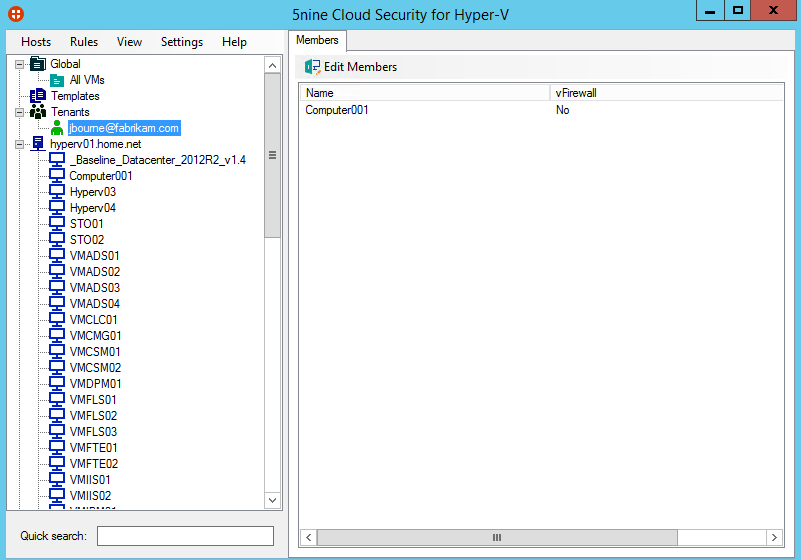
And to finish, if I open the 5-Nine Cloud Security Console, I have a Virtual Machine member of the jbourne@fabrikam.com tenant.
Conclusion
In this part we have seen how to manage the 5-Nine Cloud Security from Windows Azure Pack. We have added the Hyper-V hosts from WAP and we have delivered the Cloud Security to our tenants to provide Security as a Service. In the next part, I will protect tenant VMs with this solution.


