To deploy a large amount of consistent Virtual Machines, generalized images are often used. You can upload a generalized image that you deploy usually on your On-Premise datacenter or you can also create a generalized image directly from Microsoft Azure. In this topic I’ll explain how to capture an image directly from Azure and how to upload your already existing generalized image from the On-Premise datacenter.
What is a generalized image
A generalized image is a capture of an already installed Operating System without the machine specific settings and without user’s settings. For example the machine name, its SID, the administrator password and so on are not retained when capturing the image. That enables to customize your own image before deploying it in large scale. You can for example, install IIS role in the image before capturing it. In this way, each server deployed by using this image will have IIS pre-installed. And each server deployed with this generalized image will have its own server name, SID and so on.
To create a generalized image of a Windows Server, you have to use Sysprep. For a Linux machine you can use WAAgent (Windows Azure Agent).
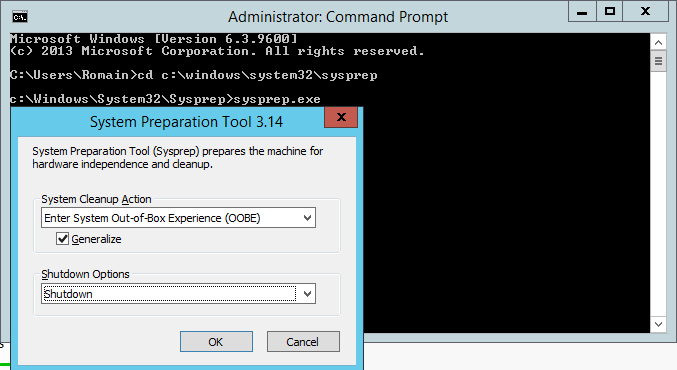
When you use Sysprep, you have to specify the above settings to create your generalized image. For more information to create a generalized image, you can read this topic.
Upload you own generalized image to Azure
N.B: To follow this guide, the Azure PowerShell module must be installed and the settings profile must be imported. For further information, please read this topic.
Once you have created your generalized image in your Datacenter, you can upload it to Azure. Be careful because currently Azure supports only VHD files. If you have created a VHDX, you can convert the VHDX to VHD by using the Hyper-V GUI or convert-VHD PowerShell cmdlet. To convert a VHDX to VHD, the disk must not be used by a running Virtual Machine.
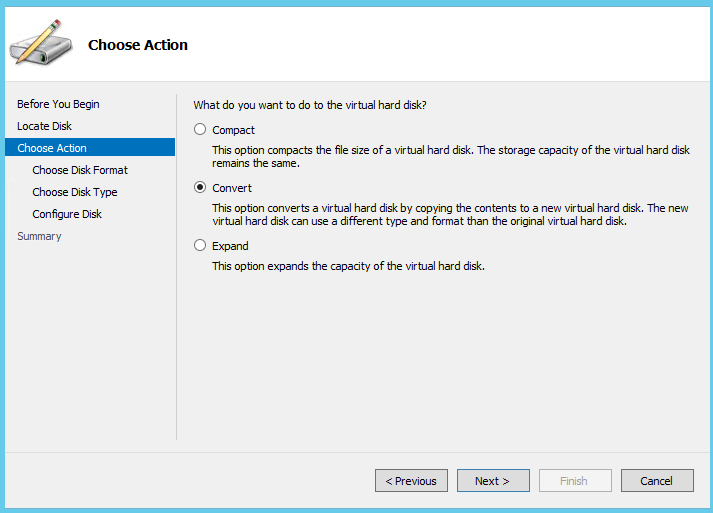
Once you have your Generalized Image in VHD format, open PowerShell. The cmdlet Add-AzureVHD enables you to upload a local VHD to a Page Blob storage. For further information about blob storage, you can read this topic.

I have uploaded a VHD file to Azure by using my home internet provider with an awesome 70KB/s… And 5 days after, my VHD was stored in Azure J.
So the next step is the creation of the VM image from the VHD previously uploaded in Azure. I open again PowerShell to run the Add-AzureVMImage cmdlet.
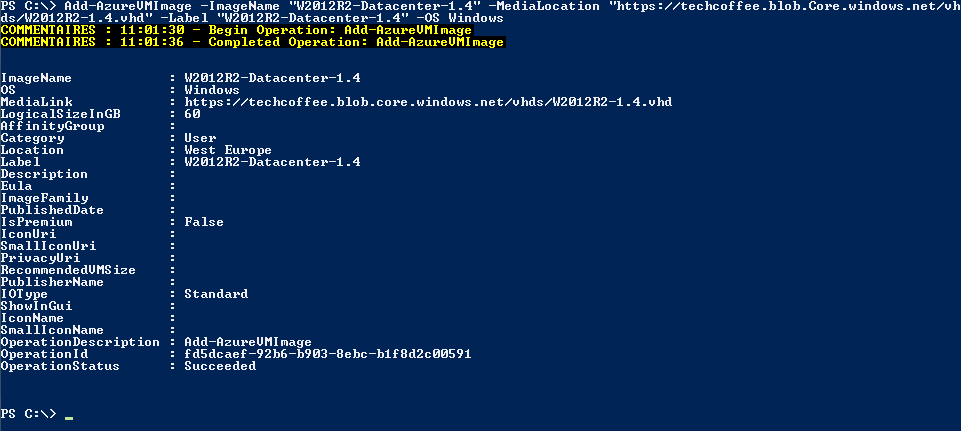
Once the VMImage is created I can deploy a Virtual Machine from this image. So I open the Azure Portal and I select new virtual machine. Then I select My Image as below.
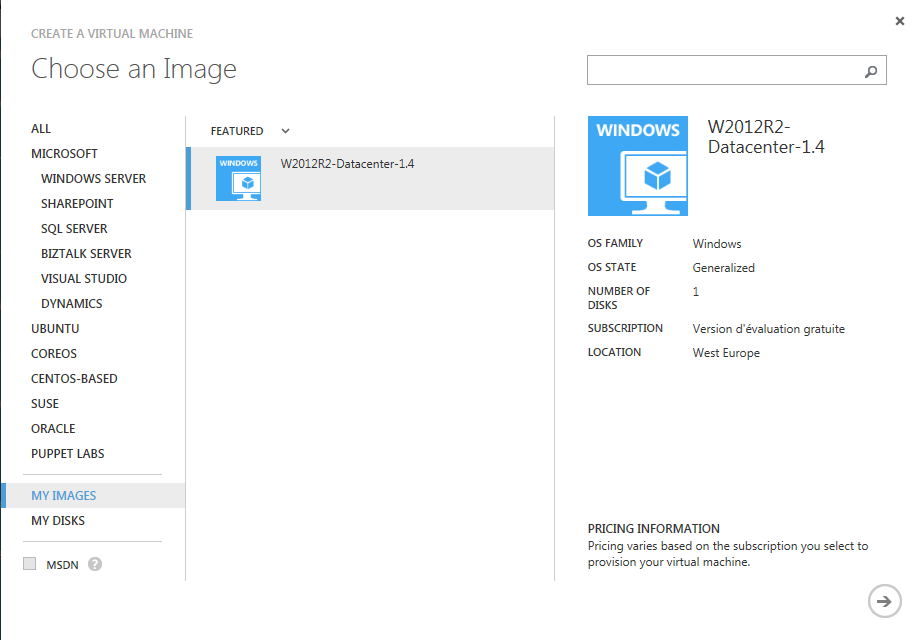
I select W2012R2-Datacenter-1.4 VM Image and I click on next. Then I configure my VM as usually.
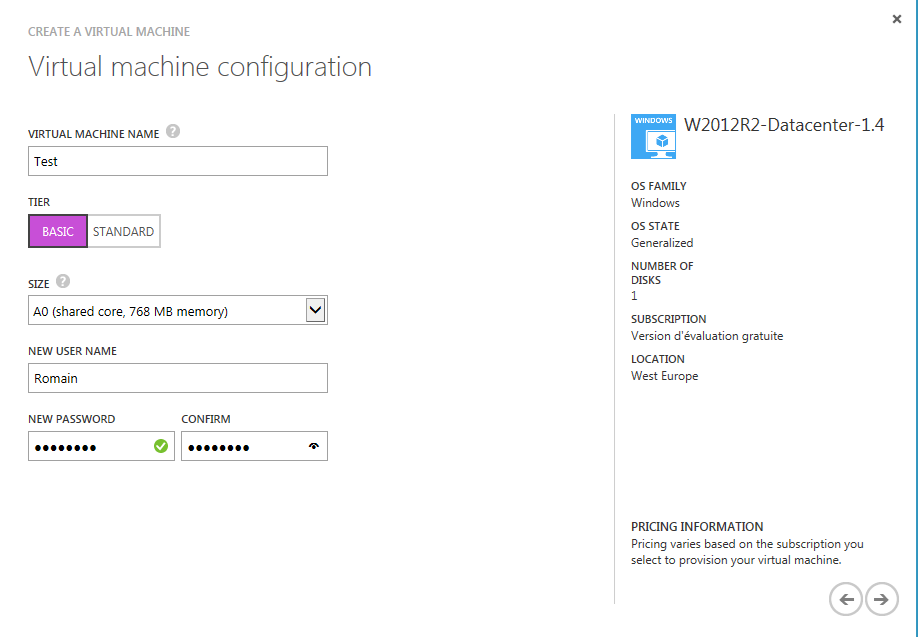
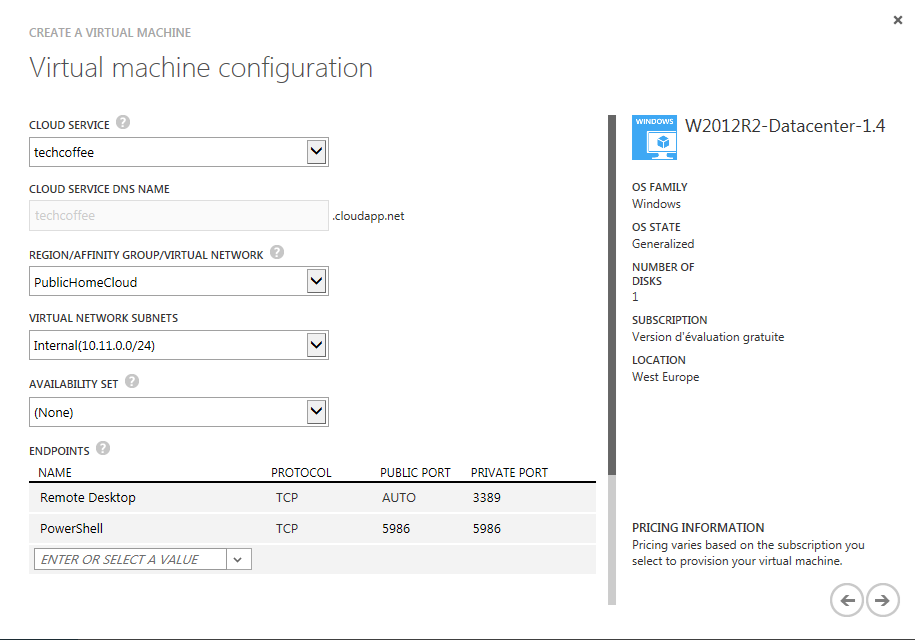
When you have finished to create the virtual machine, the provisioning should start by using your generalized image J.
Create a generalized image from Azure
To create a generalized image from Azure, first you have to create an Azure VM. When the VM is deployed you can make any customization. On my side I have installed the IIS role. Next run the Sysprep utility as below:
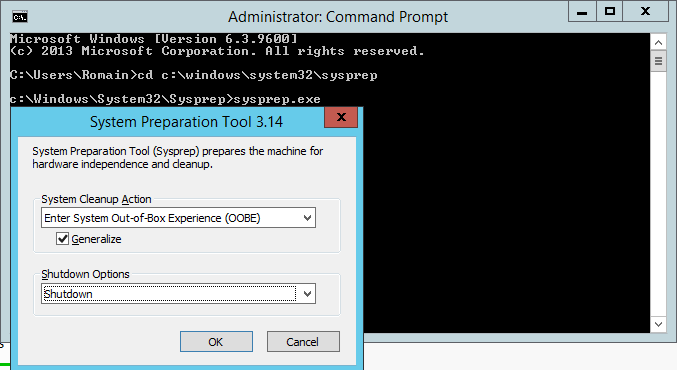
Once the Azure VM is shutdown, you can click on Capture as below.
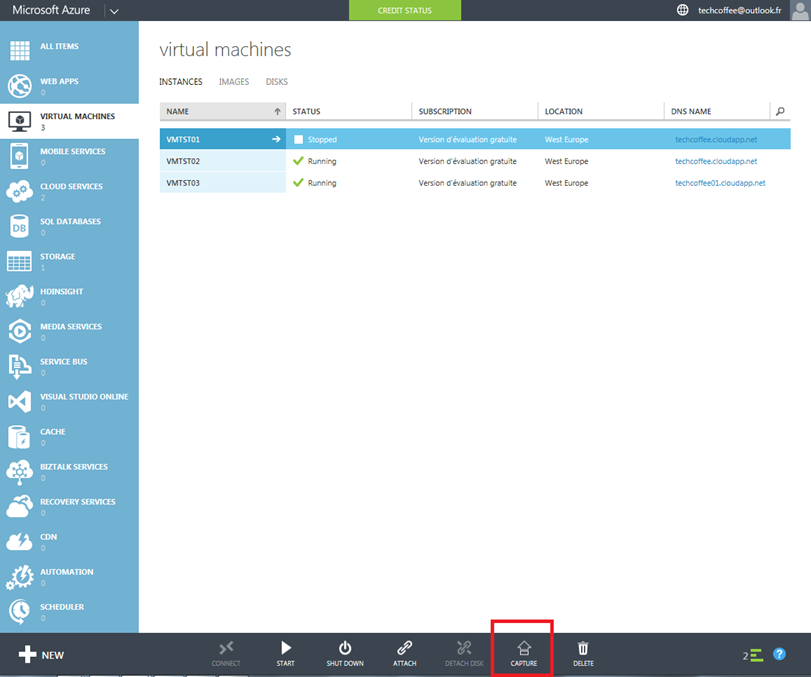
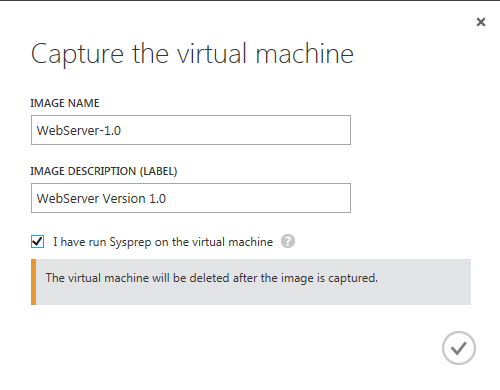
Next give a name and a description to your image, and don’t forget to check the box I have run Sysprep on the Virtual Machine. When the capture process will be finished, the source Azure VM will be deleted.
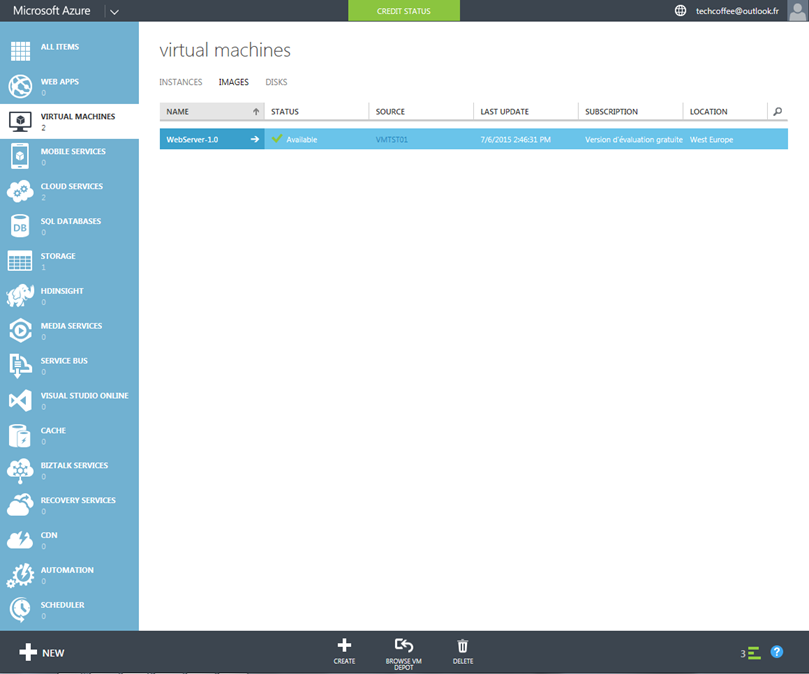
Next you can check in Images tab that your new VM image is available as below.
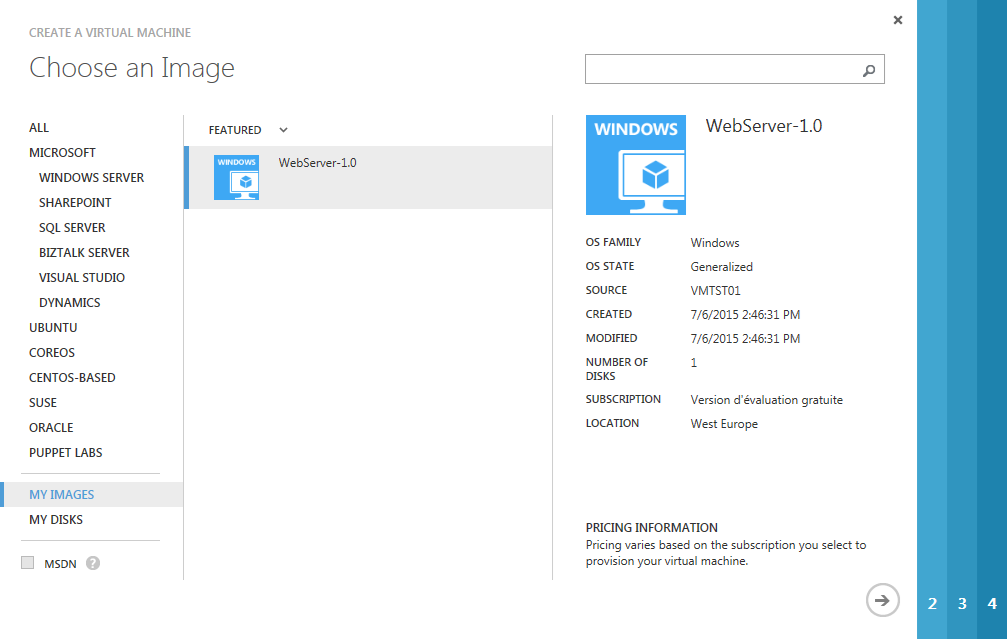
Now you can create an Azure VM from My Image repository and you can select your new imageJ.
Conclusion
In this topic we have seen how to upload an existing generalized image to Azure and how to capture a generalized image from an Azure VM. Thanks to these images, it is possible to deploy a large amount of Azure VM with consistent base installation.


Hello Romain,
Many thanks for this article 🙂 That’s what we can do in classic Azure portal https://manage.windowsazure.com. But how can we do such task in new Azure Portal ? I can NOT find anything relating to VM creation from my images in new portal
Many thanks,
Khoa
Hi,
No you can create an Image from Azure Portal on a VM. It’s a new feature. Before that, you had to deal with it by using PowerShell:https://www.starwindsoftware.com/blog/deploy-an-azure-vm-from-a-generalized-image-in-azure-rm-portal
Hello Romain,
Many thanks for your reply 🙂 I have VPN gateway to gateway created by using virtual network classic years ago to connect between on-premises and Azure.Sometimes it disconnects for many hours and I need to troubleshoot that, but I can’t file its log in Azure portal. So , is that any way to enable such VPN log ? Does Azure support for such log for virtual network classic ?
Please help me
Many thanks
Khoa