When you deploy production VMs and so production services in Azure, you often want high availability. Sometimes Microsoft makes operations in Azure Datacenter that can impact the availability of your service. Some prerequisites are required to have a 99,95% SLA on VMs in Azure. Moreover, you may need some load-balancers to route the traffic to healthy servers and to spread the charge.
In this topic, I will address the following resources in Azure Resource Manager (ARM):
- Azure VMs
- Availability Sets
- Load-Balancers
Lab overview for Highly Available IaaS 3-tier service
N.B: In this topic, I use PowerShell cmdlets to manage Azure resources. You can have further information here.
The goal of this lab regards the deployment of a 3-tier service:
- First tier: Web Servers
- Second tier: Application Servers
- Third tier: Database Servers
The user will connect to the Web Servers load-balancer. Then the Web Servers will connect to the application servers across the application load-balancer. Then Application servers will send a request to SQL Servers. The availability Set will be configured on each server role to support the 99,95% SLA.
Regarding the network, the virtual network is split into two subnets called external and internal subnet. All VMs are stored in the same storage account.

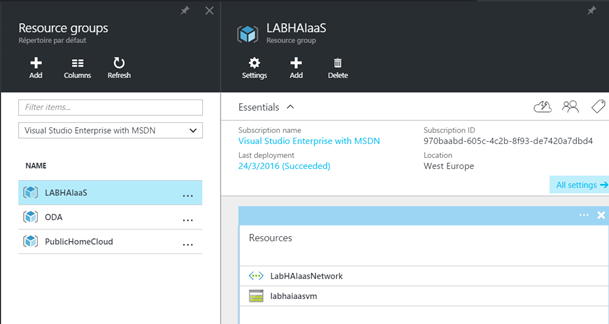
I have created the resource groups, the storage account and the virtual network. It only remains to create availability set, Azure VMs and load-balancer.
Availability Set
Usually to support High Availability, we use two servers that host the same role or/and application. Then these servers are spread across several racks, rooms or hypervisors (in case of VMs). In this way, even if an outage occurs, the others servers continue to deliver the service. In Azure, we use the Availability Set to spread in the datacenter, the Azure VMs which deliver the same service.
With Availability Set comes two concepts:
- Fault Domain: this is a physical unit for the deployment of an application. Thanks to fault domain, VMs are deployed on different servers, racks and switches to avoid a single point of failure.
- Update Domain: this is a logical unit for the deployment of an application. Servers which are associated with the same availability set will be arranged in the rack. In this way, one update domain will be unavailable at the same time when Microsoft makes an update. So servers in the remaining update domains continue to deliver the service.
To support the 99,95% SLA, I will create an availability set for each tier. To create the Availability Set from the portal, go to the Marketplace and select Availability Set. You can then specify the availability set name, the number of fault and update domains and the resource group.
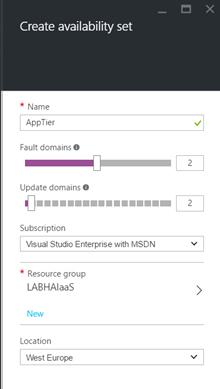
You can do the same thing with PowerShell.
New-AzureRmAvailabilitySet -ResourceGroupName LabHAIaaS -Name AppTier -Location "West Europe" -PlatformUpdateDomainCount 2 -PlatformFaultDomainCount 2
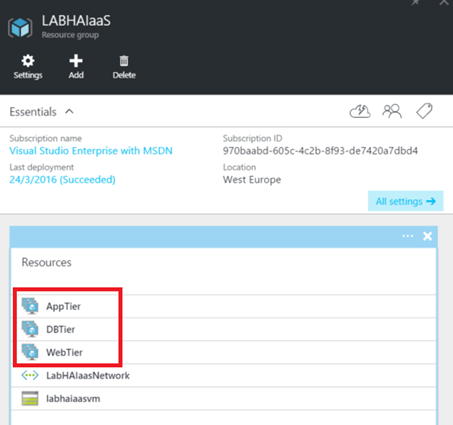
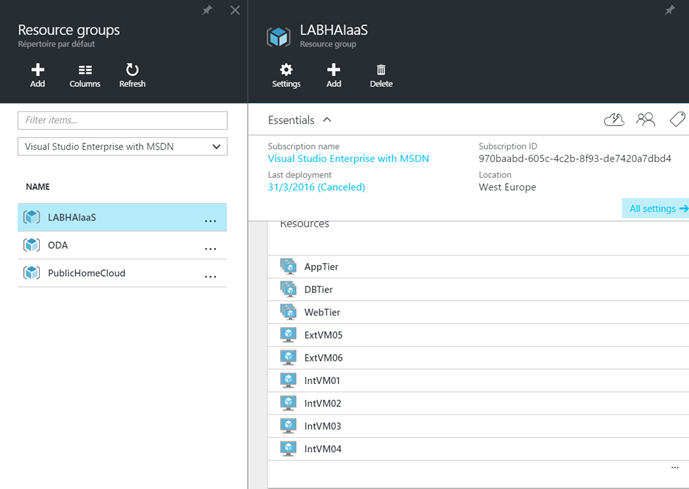
Once I have created availability sets, I have three new resources in the resource group:
Azure VMs creation
N.B: At this moment, you can’t associate availability set to a VM already created (in Azure Resource Manager) from PowerShell or from the portal.
Now I will create Azure VMs with the availability set association. You can create it by using the portal:
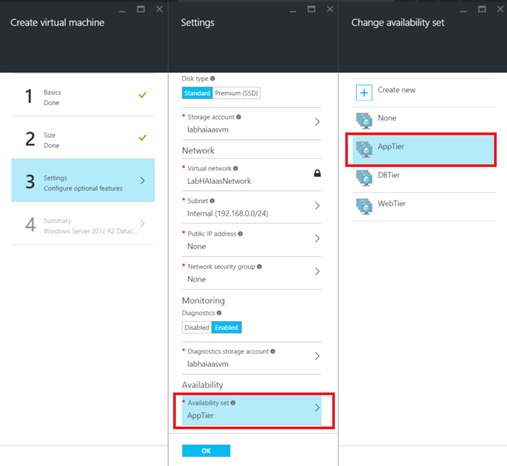
Below you can find PowerShell cmdlets to create an external virtual machine: (the public IP is needed to connect to VMs from the portal. If you have a Site-to-Site VPN, you shouldn’t need the public IP)
# Set values for existing resource group and storage account names
$rgName="LabHAIaaS"
$locName="West Europe"
$saName="labhaiaasvm"
$AVName = "WebTier"
# Ask for VM credential
$cred=Get-Credential -Message "Type the name and password of the local administrator account."

# Set the existing virtual network and subnet index
$vnetName="LabHAIaasNetwork"
$subnetIndex=1
$vnet=Get-AzureRMVirtualNetwork -Name $vnetName -ResourceGroupName $rgName

# Create the NIC.
$nicName="ExtVM06-NIC"
$pip=New-AzureRmPublicIpAddress -Name $nicName -ResourceGroupName $rgName -Location $locName -AllocationMethod Dynamic
$nic=New-AzureRmNetworkInterface -Name $nicName -ResourceGroupName $rgName -Location $locName -SubnetId $vnet.Subnets[$subnetIndex].Id -PublicIpAddressId $pip.Id

#Availabiloty Set
$AvID = (Get-AzureRmAvailabilitySet -ResourceGroupName $RGName -Name $AvName).id

# Specify the name, size, and existing availability set
$vmName="ExtVM06"
$vmSize="Standard_A0"
$vm=New-AzureRmVMConfig -VMName $vmName -VMSize $vmSize -AvailabilitySetId $AvID

# Specify the image and local administrator account, and then add the NIC
$pubName="MicrosoftWindowsServer"
$offerName="WindowsServer"
$skuName="2012-R2-Datacenter"
$vm=Set-AzureRmVMOperatingSystem -VM $vm -Windows -ComputerName $vmName -Credential $cred -ProvisionVMAgent -EnableAutoUpdate
$vm=Set-AzureRmVMSourceImage -VM $vm -PublisherName $pubName -Offer $offerName -Skus $skuName -Version "latest"
$vm=Add-AzureRmVMNetworkInterface -VM $vm -Id $nic.Id

# Specify the OS disk name and create the VM
$diskName="OSDisk"
$storageAcc=Get-AzureRmStorageAccount -ResourceGroupName $rgName -Name $saName
$osDiskUri=$storageAcc.PrimaryEndpoints.Blob.ToString() + "vhds/" + $vmName + $diskName + ".vhd"
$vm=Set-AzureRmVMOSDisk -VM $vm -Name $diskName -VhdUri $osDiskUri -CreateOption fromImage
New-AzureRmVM -ResourceGroupName $rgName -Location $locName -VM $vm
Once all Azure VMs are created, I have 6 VMs in the resource group with their own network interfaces.
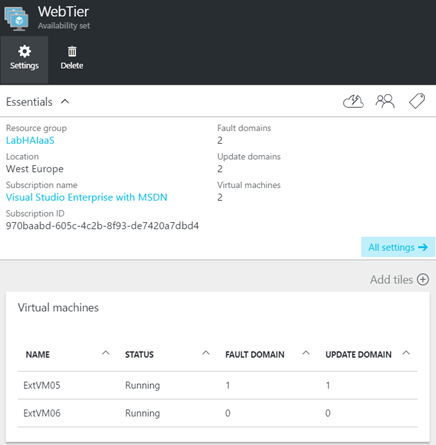
In the below example, you can see that Azure VMs that belong to the WebTier availability set are spread between two fault and update domains.
Implement the external load-balancer
Now that Azure VMs are created and are in availability sets, we can create the Load-Balancer. First, I create the external Load-Balancer for the Web servers (WebTier). Open the marketplace and type Load-Balancer. Then create it and chose the Public scheme. Create a public static IP as below and select the resource group.
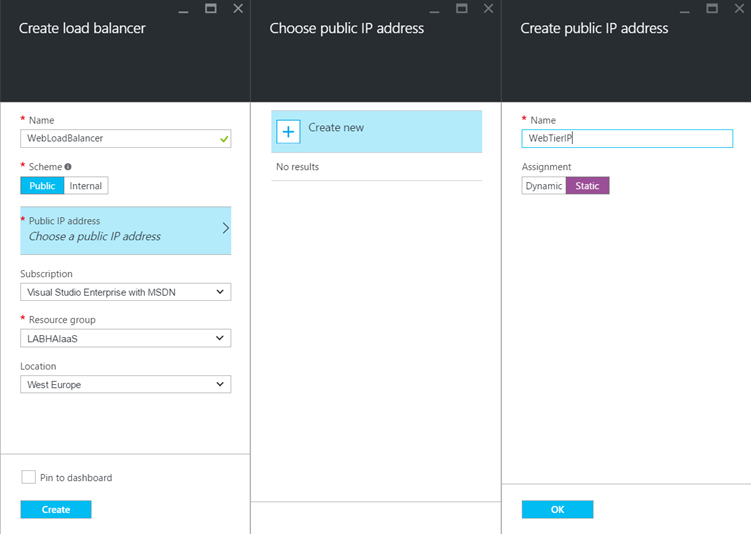
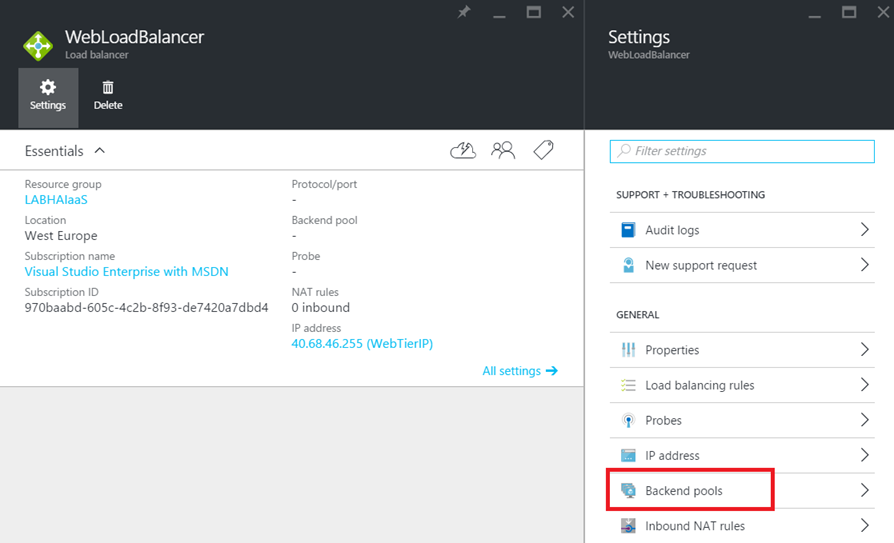
Once the load-balancer is created, open settings and select Backend Pools.
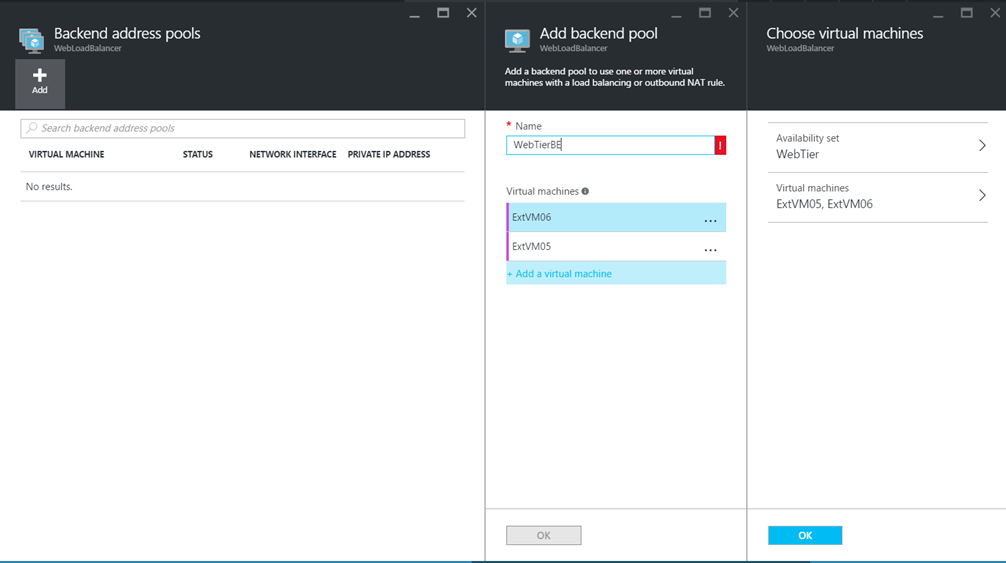
Then create a backend address pool, and choose the WebTier availability Set and the Azure VMs as below.
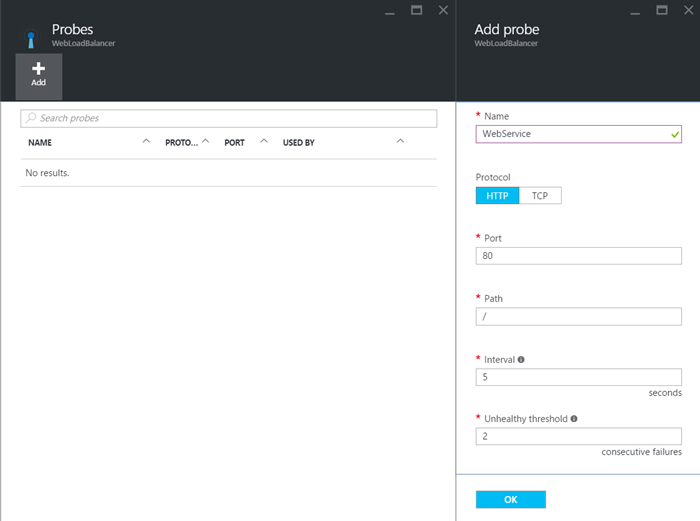
Now you can create a probe to verify the health of your application. In the below example I create a probe for a web service which listens on HTTP/80.
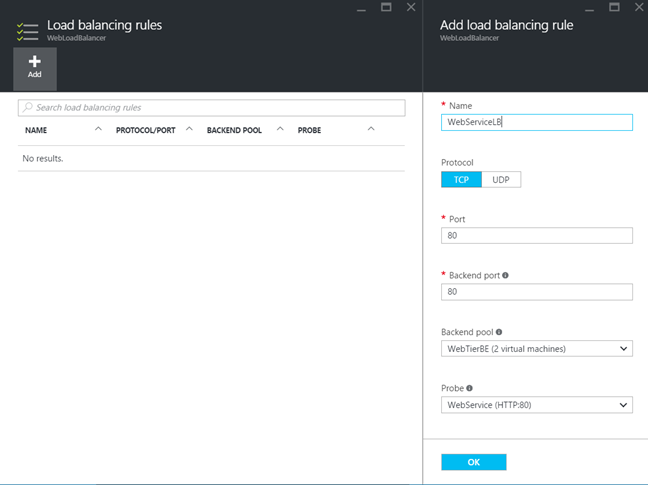
Once the probe is created, we can create a load-balancing rule related to the probe health. If a server is not healthy, the load-balancer will not route traffic to this server.
Implement internal Load Balancer
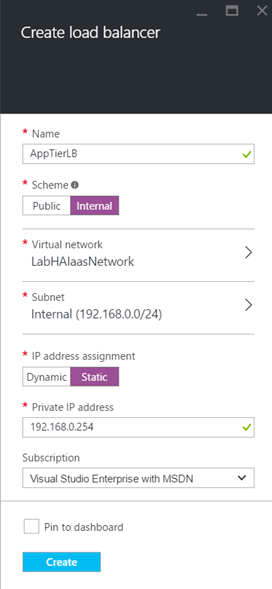
As the external Load-Balancer, create again a load-balancer but this time select the Internal scheme. Then select the virtual network and the internal subnet (where are the application servers). To finish, select the resource group and set a static IP address.
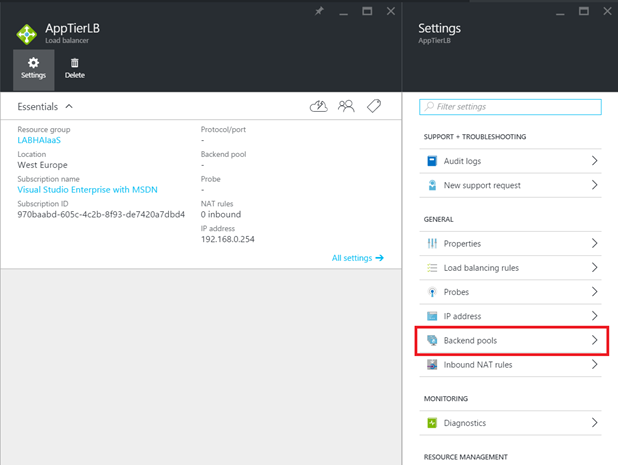
Next, open the settings of this load-balancer and select Backend Pools.
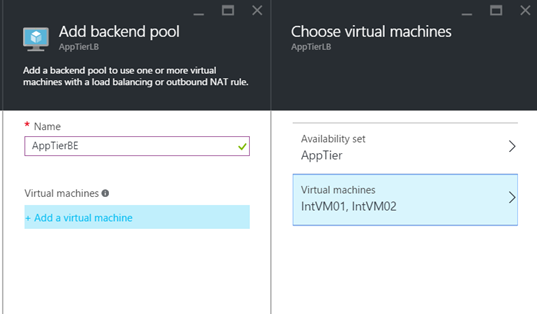
Then create a backend pool and select the AppTier availability set and its Azure VMs.
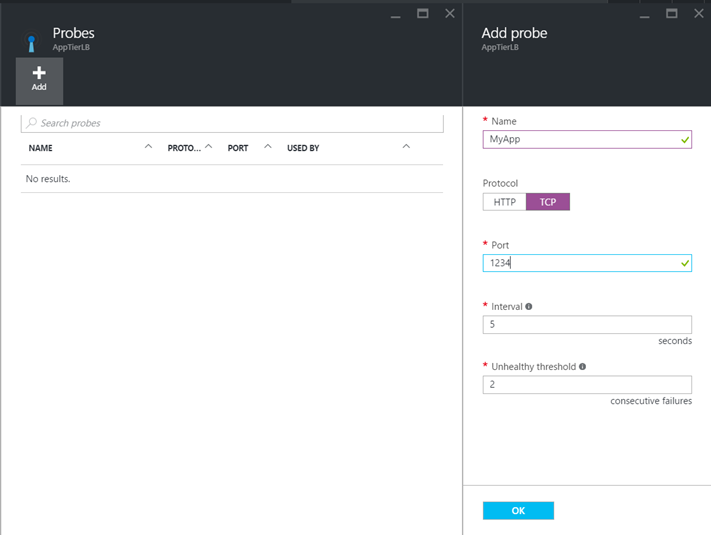
Then I create a probe to verify the health of the application on port TCP/1234.
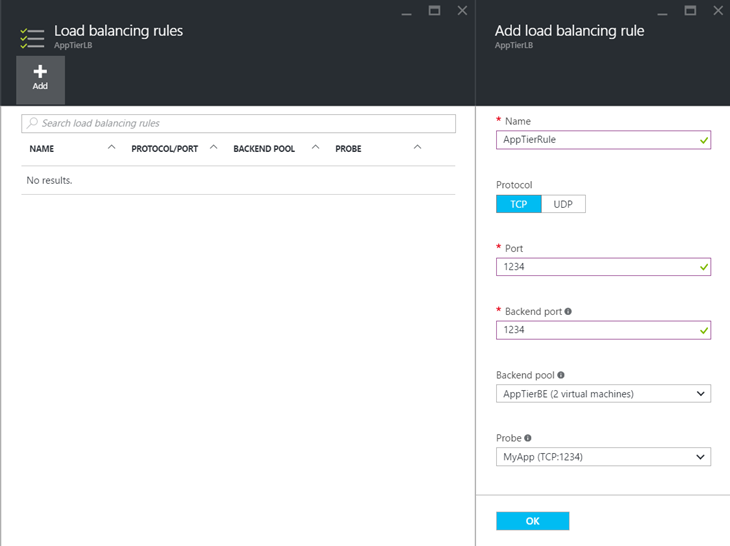
To finish, I create the load-balacing rule based on the previous probe to route the traffic to healthy servers.
