To support the high availability of Virtual Machines, a Hyper-V Cluster is often implemented. In a high density environment, Hyper-V hosts are almost always managed from Virtual Machine Manager (VMM). VMM enables to centralize the management of your fabric (virtual network, storage and Hypervisor). So VMM is able to manage Hyper-V cluster from implementation to management. In this topic I will implement a Hyper-V Cluster from VMM 2012R2.
“Inception” Lab
Because I have not enough servers in my lab, the Hyper-V host Hyperv03 and Hyperv04 are Virtual Machines. So I have a Hypervisor in a Hypervisor (nested hypervisor). It doesn’t change the way to implement the Hyper-V cluster. However the Network Interface Cards (NICs) are virtual. So I call them vmNICs and no NIC teaming will be created.
Hyper-V Cluster design
Each Hyper-V host needs at least four vmNICs:
- Storage Network: it will be used to communicate with storage device by iSCSI;
- Live-Migration Network: it will be used to migrate a VM from one host to the other;
- Cluster Network: it will be used for cluster heartbeat;
- Management Network: it will be used for Parent Partition communication (Active Directory, RDP etc.).
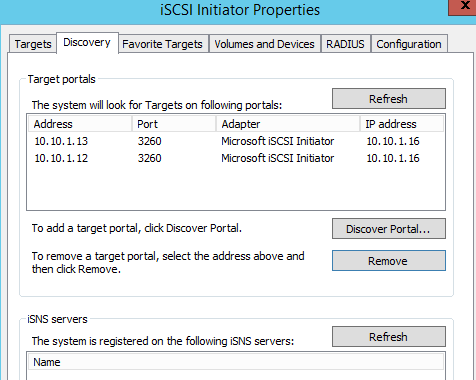
The storage device is implemented with StarWind Virtual SAN in two-node configuration (10.10.1.12 and 10.10.1.13). So each Hyper-V host will be connected to these two nodes. MPIO will manage the multi-path.

Hyper-V host installation
On each Hyper-V host I have installed Windows Server 2012R2 datacenter with the last updates. I have only installed MPIO. Hyper-V and Failover Clustering feature will be installed from VMM. Each Hyper-V host are members of my Active Directory domain.
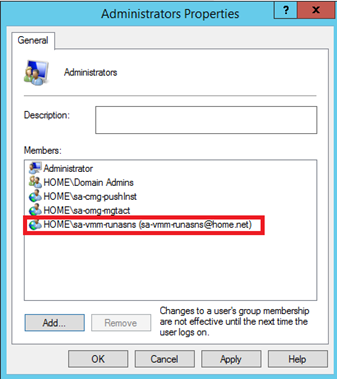
On each Hyper-V host I have added a VMM RunAs account in the local Administrators group:
Add Hyper-V host to VMM
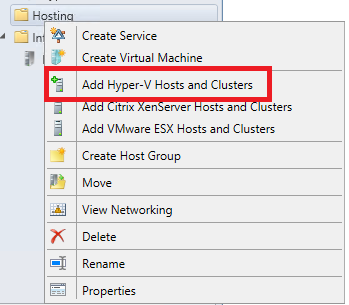
First of all, the Hyper-V host must be added to VMM. For that, connect to VMM and right click to a host group. Select Add Hyper-V hosts and Clusters.
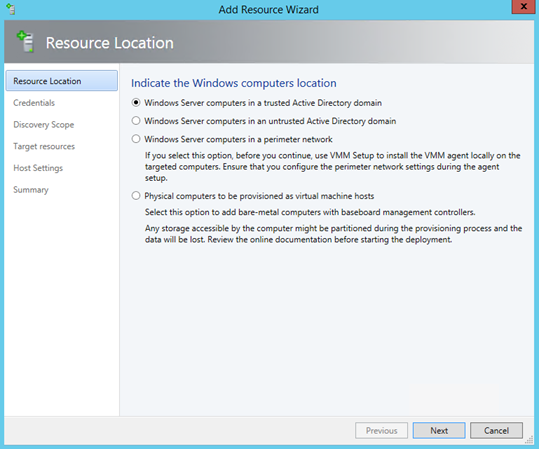
Next select Windows Server computers in a trusted Active Directory Domain. I choose this option because my Hyper-V host and my VMM are in the same domain.
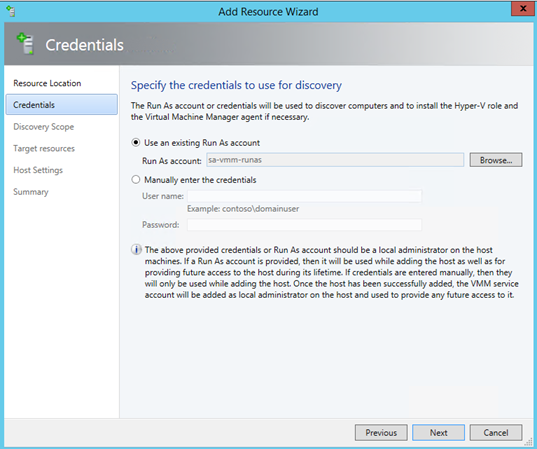
Then specify the RunAs account that you have added in each local Administrators group of your Hyper-V hosts.
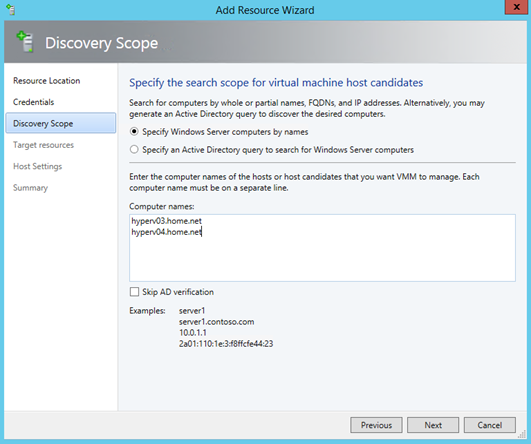
On the next screen, specify the Hyper-V host name and click on next.
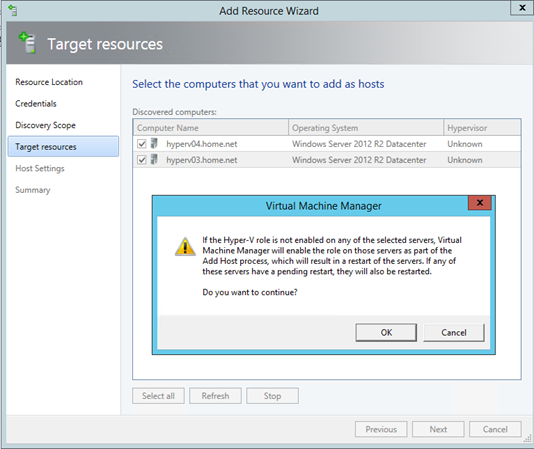
If Hyper-V role is not installed, you will have the below message. It says that VMM will enable the Hyper-V role on each server.
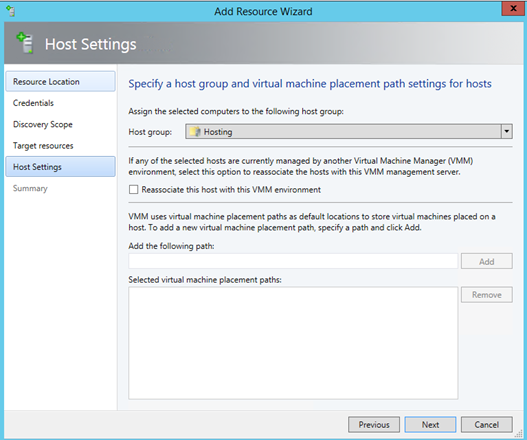
Next choose your host group and click on next.
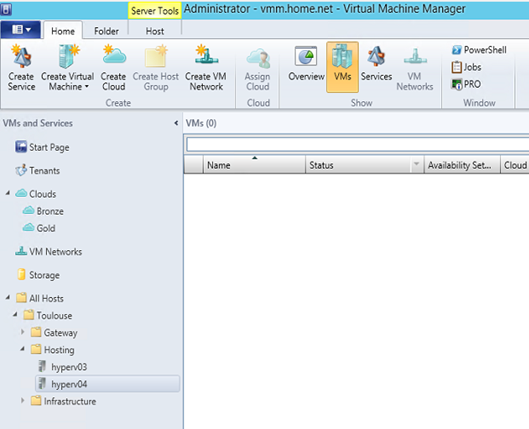
When the process is finished, you should have your Hyper-V host in the host group:
NB: In the real work, it is at this moment that you have to configure Logical Switch on your Hyper-V hosts. Because I use VM for this demo, I can’t configure Logical Switch because I can’t enable Hyper-V extensible virtual switch on a virtual NICs.
Create the Hyper-V Cluster
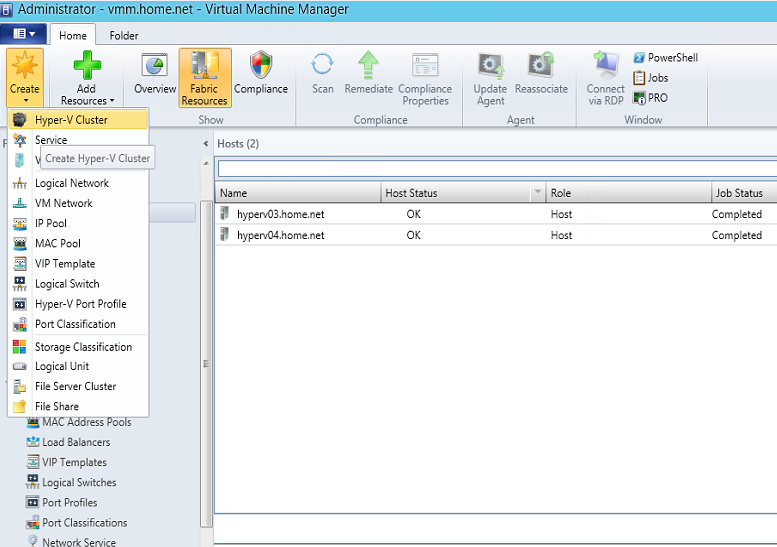
To create a Hyper-V Cluster from VMM, navigate to the fabric, click on Create and select Hyper-V Cluster as below.
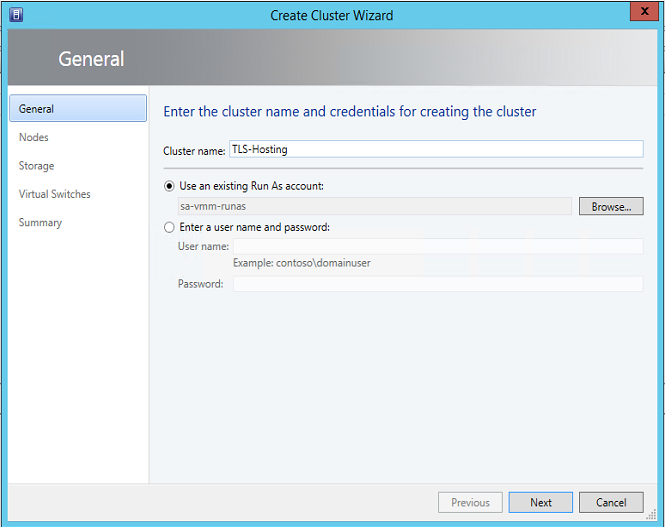
Next give a name to your Cluster and select the RunAs account.
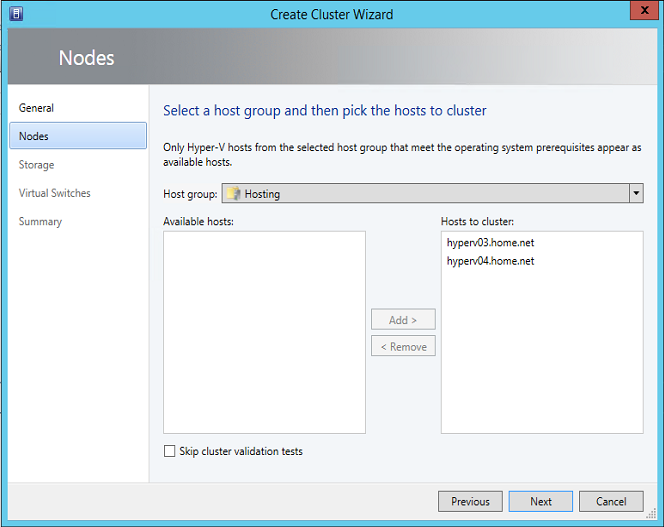
Then select the Hyper-V hosts that will be members of your cluster.
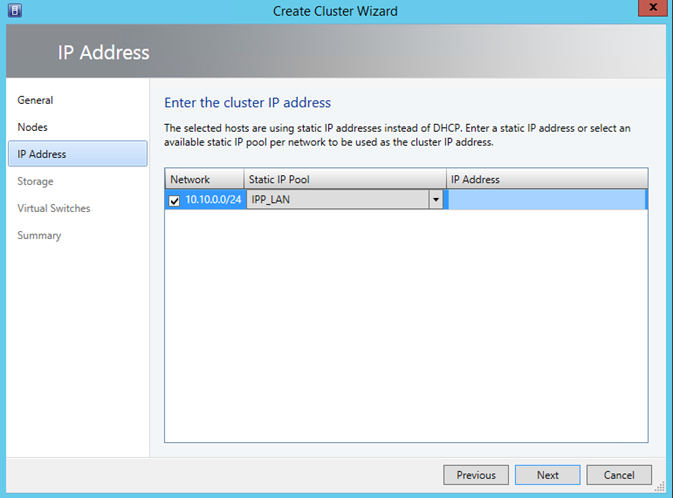
Next specify the Static IP Pool where will be picked the cluster IP address. You can also specify manually the IP Address that belongs to this network.
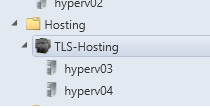
Once the cluster is created, it should appear in the host group as below.
Configure Failover Clustering network
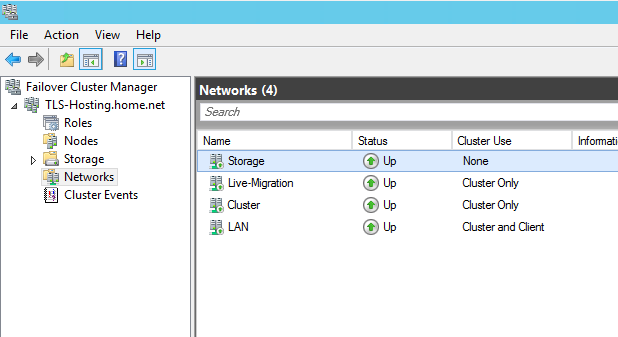
This step will be the only one that will be managed from the Failover Clustering console. In this step I will rename the cluster network, set the cluster use and specify the Live-Migration network. So connect to the failover clustering console and navigate to networks. First I rename each network to ease the management and I configure the cluster use as below.
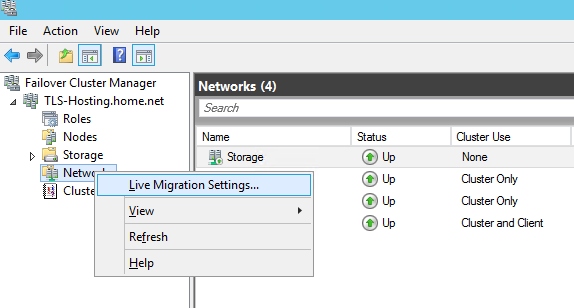
Next right click on Networks, and select Live Migration Settings.
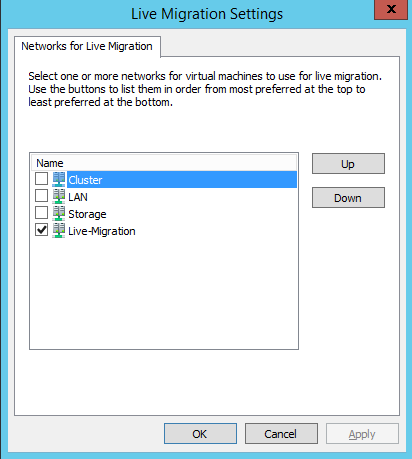
Then I select only the Live-Migration network and I click on OK.
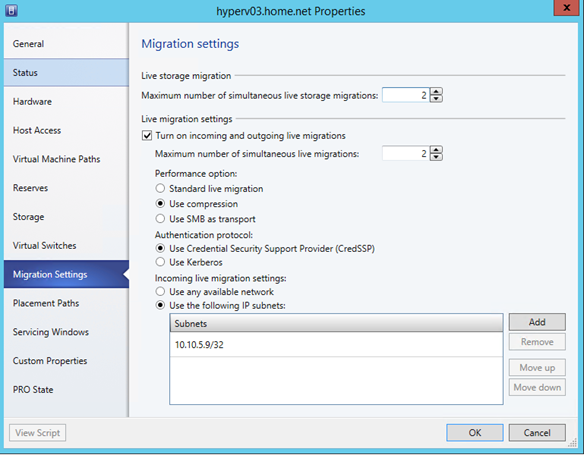
Next I come back to the VMM console and I run a refresh of the cluster. When the refresh is completed, I open the properties of the cluster and I navigate to Migration Settings. As you can see below, only one live-migration network is set.
Configure Kerberos for Live-Migration authentication protocol
To enable Kerberos for Live-Migration, we have to set some Kerberos constrained delegation in Active Directory. So open dsa.msc and edit the properties of Hyper-V hosts. Then navigate to Delegation and select Trust this computer for delegation to specified services only as below. Next click on Add and specify the other Hyper-V host name. Navigate to select Microsoft Virtual System Migration Service.
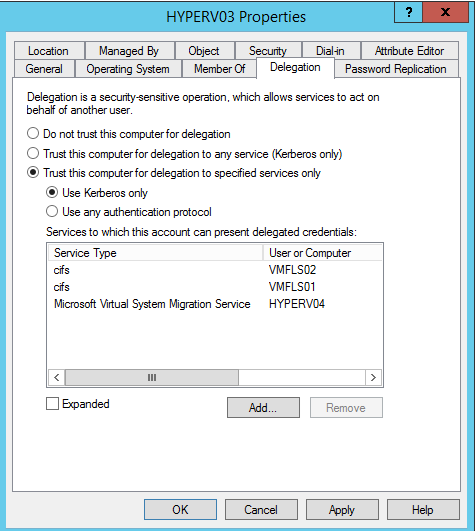
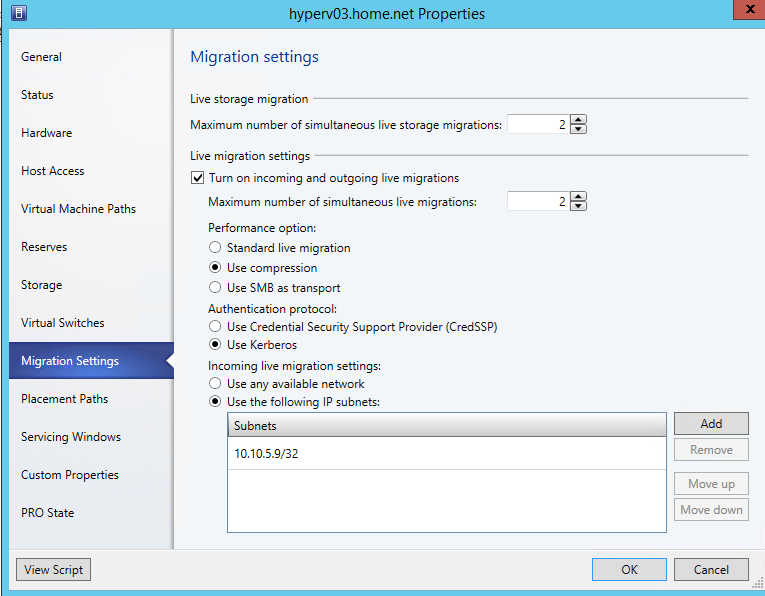
Repeat the same steps for the other Hyper-V host. Then come back to Migration Settings and select Use Kerberos.
Add storage to Hyper-V Cluster
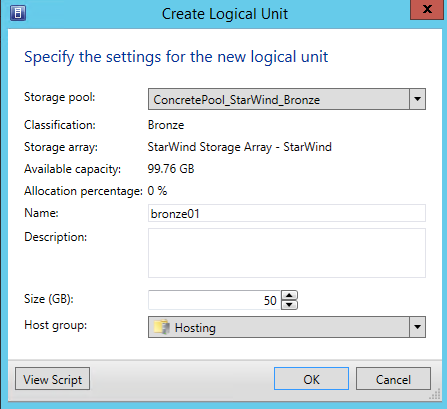
First I navigate to the fabric to create a LUN called bronze01 as below. This LUN is created on my iSCSI storage device (StarWind Virtual SAN).
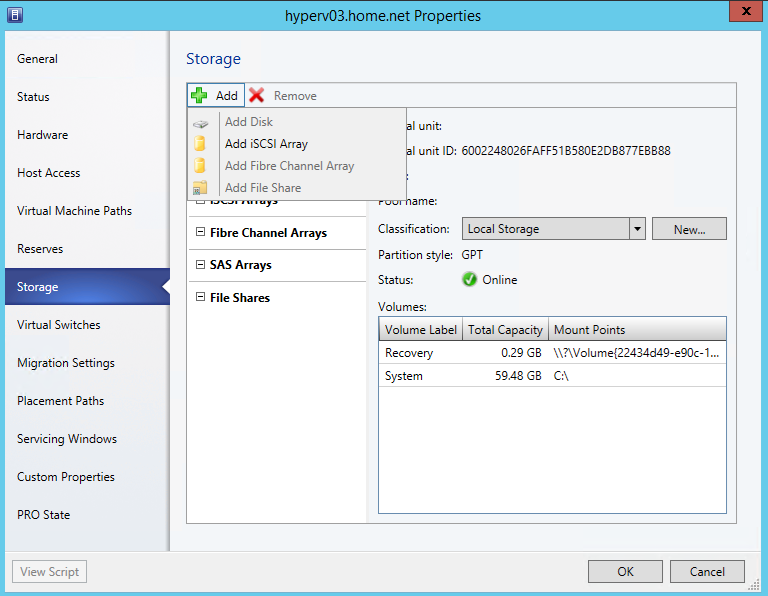
Then I edit the properties of each Hyper-V host and I navigate to Storage. Next I select Add iSCSI Array as below.
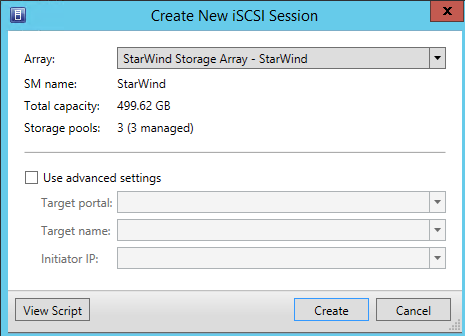
I select the iSCSI array and I click on Create.
When it is done, you should have something like this in your iSCSI initiator properties of your Hyper-V hosts.
Next I navigate to the storage properties of the cluster and I add the LUN bronze01 as available storage.
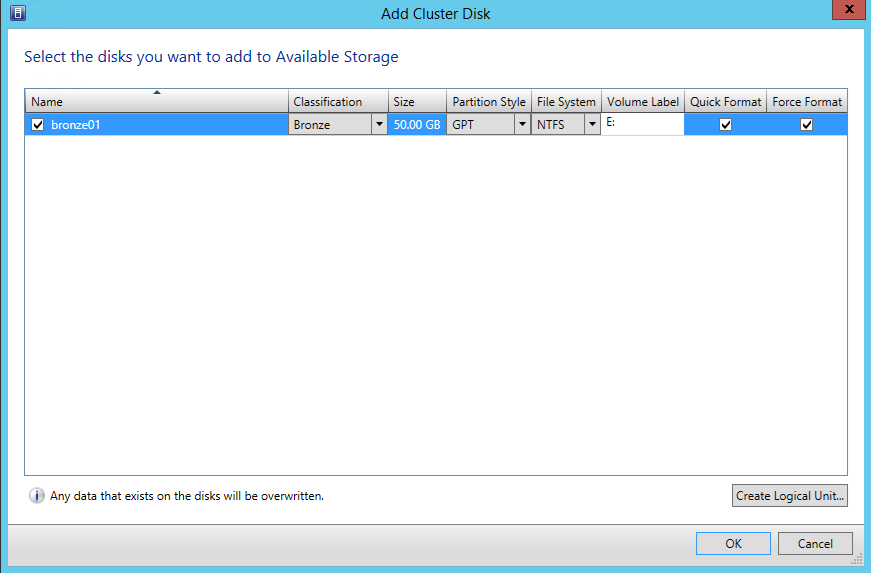
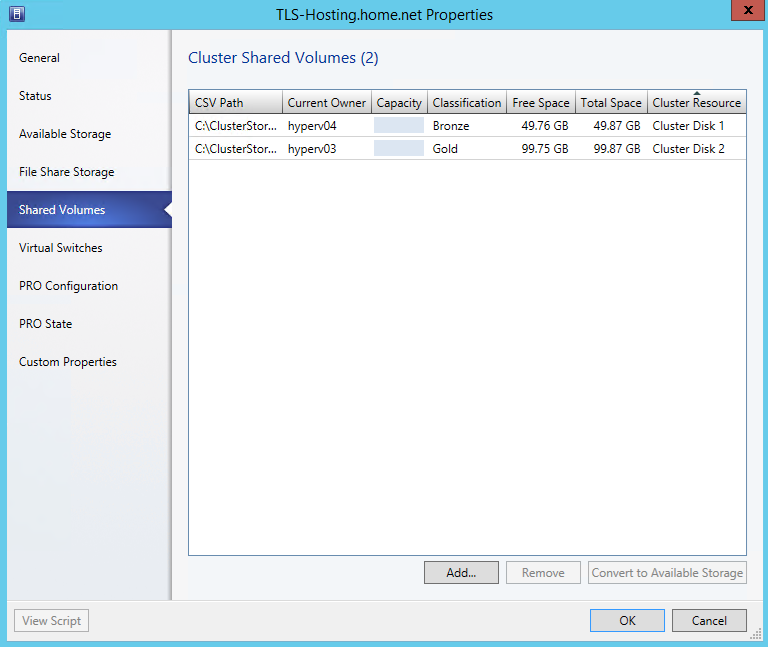
I decide also to create another LUN from the above window called gold01. So at the end I have two LUNs in available storage. So I select these two LUNs and I click on convert to CSV.
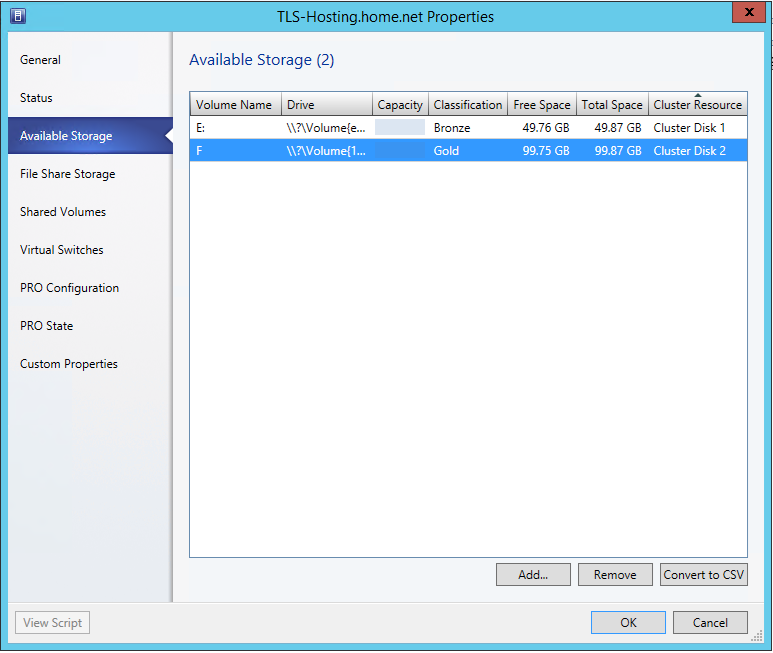
And that’s it ! We have added Cluster Shared Volume to Hyper-V Cluster from VMM console.
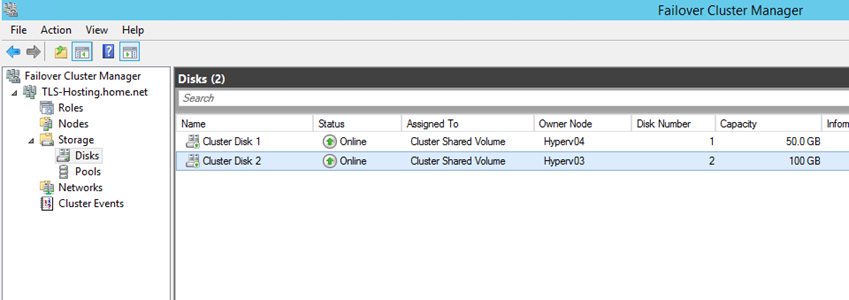
And we have the same information from the VMM console.
Conclusion
As you have seen in this topic, I have implemented and managed a Hyper-V cluster from the VMM console. This eases the management of your fabric. Now think about the Hyper-V Bare-Metal Deployment. By using this, you can deploy the Hyper-V hosts with a standard configuration (network, OS configuration and so on) and next add your Hyper-V host to the cluster from VMM. So you can manage the scalability really quickly and easily.


An excellent sharing Romain. Many thanks to you.
Thank you Hasan 🙂