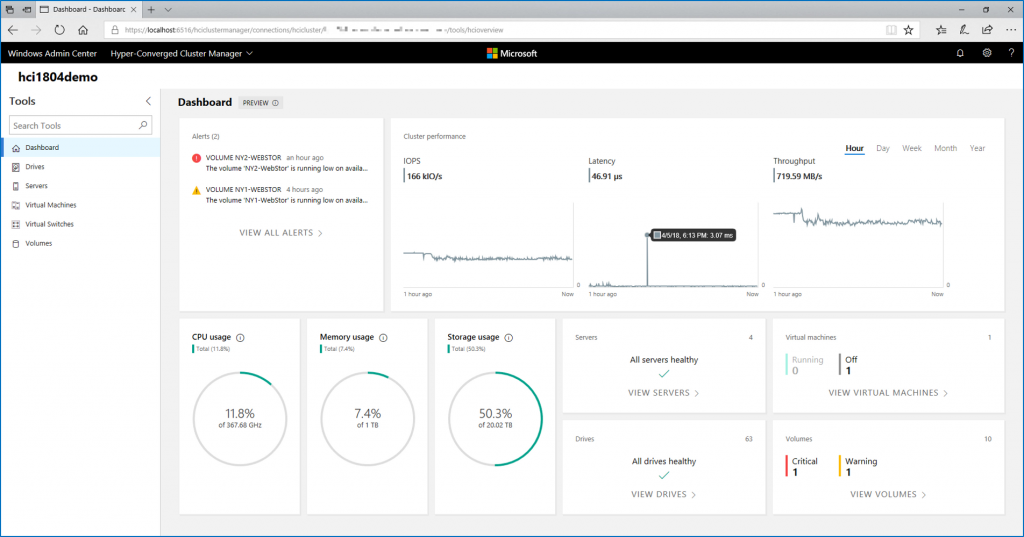
Microsoft has recently announced a new version of Windows Server 2016 called Nano Server. The main advantage of this Windows Server version is the small footprint. For that, Microsoft has removed the Graphical User Interface stack, 32-bit support, local logins or Remote Desktop support. Nano Server can be managed only remotely by using PowerShell, WMI or WinRM. Nano Server has been designed for two kinds of usage:
- Cloud infrastructure components as Hyper-V or Scale-Out File Server ;
- Cloud apps built on runtime as Java, .Net and so on. Nano Server supports container through Hyper-V (and maybe via Docker later).
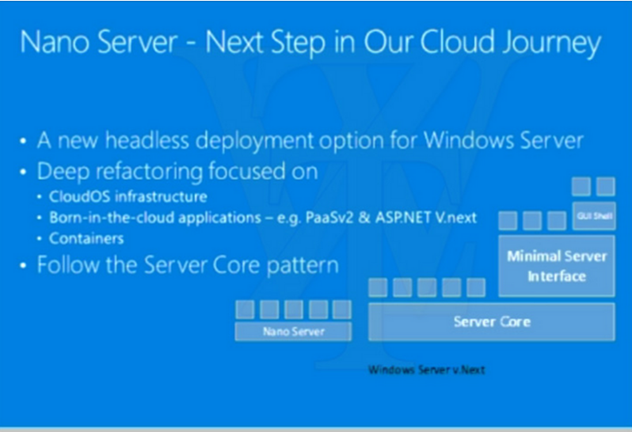
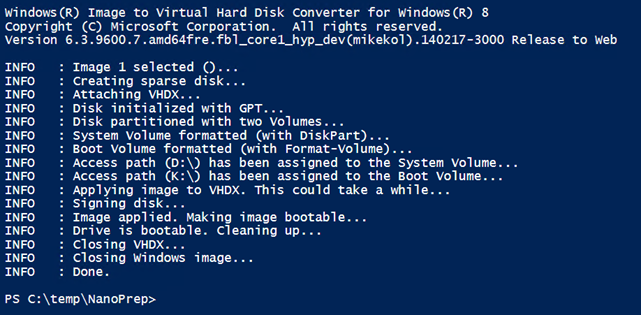
The Windows Server 2016 Technical Preview 2 has been released this week and brings the Nano Server through a WIM file. This kind of file is great to deploy by using DHCP/WDS but I wanted to build a VHDX image to deploy Virtual Machines without using PXE. This Microsoft guide describes how to build the VHDX file from the WIM included in the Windows Server Technical Preview 2 ISO.
Preparation
First, we have to prepare our environment to do the job. So download the Windows Server TC2 ISO here. While the ISO is downloading, I create some folders by using this script (don’t forget to change the $ParentFolder variable):
$ParentFolder = "c:\temp\NanoPrep"
New-Item -ItemType Directory -Path $($ParentFolder + "\Dism")
New-Item -ItemType Directory -Path $($ParentFolder + "\VHDX")
New-Item -ItemType Directory -Path $($ParentFolder + "\Packages")
New-Item -ItemType Directory -Path $($ParentFolder + "\MountDir")
New-Item -ItemType Directory -Path $($ParentFolder + "\WIM")
My Work Folder looks like this:

Next I have downloaded the Convert-WindowsImage.ps1 script from this URL. I’ve downloaded this script in the $ParentFolder directory. Once your Windows Server TC2 ISO is downloaded, you can mount it and run the below script. This script will copy the WIM file and the package locally. Next, all files related to Dism are copied in the Dism folder. To finish it will make a VHDX image from the WIM file.
$ParentFolder = "c:\temp\NanoPrep"
$ISOPath = "C:\Temp\10074.0.150424-1350.fbl_impressive_SERVER_OEMRET_X64FRE_EN-US.ISO"
Mount-DiskImage $ISOPath
$DriveLetter = (Get-DiskImage $ISOPath | Get-Volume).DriveLetter
$ISONanoPath = $DriveLetter + ":\NanoServer"
$ISOSourcePath = $DriveLetter + ":\Sources"
Copy-Item -Path $($ISONanoPath + "\NanoServer.wim") -Destination $($ParentFolder + "\WIM")
Copy-Item -Path $($ISONanoPath + "\Packages\*") -Destination $($ParentFolder + "\Packages") -Recurse
Copy-Item -Path $($ISOSourcePath + "\api*downlevel*.dll") -Destination $($ParentFolder + "\Dism")
Copy-Item -Path $($ISOSourcePath + "\*dism*") -Destination $($ParentFolder + "\Dism")
Copy-Item -Path $($ISOSourcePath + "\*provider*") -Destination $($ParentFolder + "\Dism")
Dismount-DiskImage $ISOPath
Set-Location $ParentFolder
Convert-WindowsImage.ps1 -SourcePath $($ParentFolder + "\WIM\NanoServer.wim") `
                         -VHD $($ParentFolder + "\VHDX\NanoServer.vhdx") `
                         -VHDFormat VHDX `
                         -Edition 1 `
                         -VHDPartitionStyle GPT
Add packages to the VHDX image
Previously, we have copied some packages in our work folder. Below you have the description of each package.
| Role or feature | Package file |
| Hyper-V role | Microsoft-NanoServer-Compute-Package.cab |
| Failover Clustering | Microsoft-NanoServer-FailoverCluster-Package.cab |
| Drivers for hosting Nano Server as a virtual machine | Microsoft-NanoServer-Guest-Package.cab |
| Basic drivers for a variety of network adapters and storage controllers | Microsoft-NanoServer-OEM-Drivers-Package.cab |
| File Server role and other storage components | Microsoft-NanoServer-Storage-Package.cab |
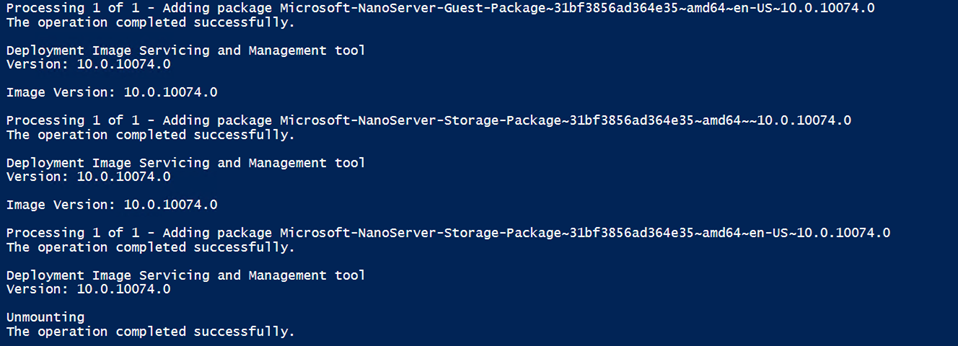
Now it’s time to add this package to the NanoServer.vhdx image. For that the command dism will be used. The below script mount the image, add the packages and dismount the vhdx and commit the modification.
$ParentFolder = "c:\temp\NanoPrep"
Set-Location $ParentFolder
dism\dism /Mount-Image /ImageFile:$($ParentFolder + "\VHDX\NanoServer.vhdx") /index:1 /MountDir:$($ParentFolder + "\MountDir")
dism\dism /add-Package /PackagePath:$($ParentFolder + "\packages\Microsoft-NanoServer-Compute-Package.cab") /Image:$($ParentFolder + "\MountDir")
dism\dism /add-Package /PackagePath:$($ParentFolder + "\packages\en-us\Microsoft-NanoServer-Compute-Package.cab") /Image:$($ParentFolder + "\MountDir")

dism\dism /add-Package /PackagePath:$($ParentFolder + "\packages\Microsoft-NanoServer-OEM-Drivers-Package.cab") /Image:$($ParentFolder + "\MountDir")
dism\dism /add-Package /PackagePath:$($ParentFolder + "\packages\en-us\Microsoft-NanoServer-OEM-Drivers-Package.cab") /Image:$($ParentFolder + "\MountDir")

dism\dism /add-Package /PackagePath:$($ParentFolder + "\packages\Microsoft-NanoServer-FailoverCluster-Package.cab") /Image:$($ParentFolder + "\MountDir")
dism\dism /add-Package /PackagePath:$($ParentFolder + "\packages\en-us\Microsoft-NanoServer-FailoverCluster-Package.cab") /Image:$($ParentFolder + "\MountDir")

dism\dism /add-Package /PackagePath:$($ParentFolder + "\packages\Microsoft-NanoServer-Guest-Package.cab") /Image:$($ParentFolder + "\MountDir")
dism\dism /add-Package /PackagePath:$($ParentFolder + "\packages\en-us\Microsoft-NanoServer-Guest-Package.cab") /Image:$($ParentFolder + "\MountDir")

dism\dism /add-Package /PackagePath:$($ParentFolder + "\packages\Microsoft-NanoServer-Storage-Package.cab") /Image:$($ParentFolder + "\MountDir")
dism\dism /add-Package /PackagePath:$($ParentFolder + "\packages\en-us\Microsoft-NanoServer-Storage-Package.cab") /Image:$($ParentFolder + "\MountDir")

dism\dism /Unmount-Image /Mountdir:$($ParentFolder + "\MountDir") /commit
Configure Nano Server with a response file
It is possible to use a unattend.xml file to auto configure some settings in the server as the hostname, the time zone and so on. First, I prepare the machine to join my Active Directory Domain. So I run the below script:
$ParentFolder = "c:\temp\NanoPrep"
djoin.exe /provision /domain home.net /machine NanoServer01 /savefile $($ParentFolder + "\odjblob")
When this script is finished, a new computer account is created in Active Directory. I can move the object to apply a GPO and so manage Firewall for example J

Next I open the odjblob file and I copy the content. It looks like this:
ARAIAMzMzMwwAwAAAAAAAAAAAgABAAAAAQAAAAQAAgABAAAAAQAAAAgDAAAIAAIACAMAAAEQC ADMzMzM+AIAAAAAAADwZEKYcKZCmDCeQpigHUKYCAAKAGB6QpgQABIAcKtCmBAAEgCwp0KYPSW gj2mer06GzNIgAe4zfbClQpjA/kGYcKNCmAEAAAA9JaCPaZ6vTobM0iAB7jN9MKJCmLCdQpj88QDgsJ5Cm LCrQpgAAAAACQAAAAAAAAAJAAAAaABvAG0AZQAuAG4AZQB0AAAAAAANAAAAAAAAAA0AAABOAGE AbgBvAFMAZQByAHYAZQByADAAMQAAAAAAeQAAAAAAAAB5AAAAUwBfADUALgBdACAAZwAnAEYAL QB0AFQAOgAsADcAKgAlAEYANAAnADUAJwBPADgAdgBZACYAWAAqADoAJQAuAC4APAB3AEQAaABs AF4APwBEAGEAJQBIAHMAbgB5AEcAIQBVAEUATQBxACcATgByACEAMABbADsAUgA6AD8ARAAuAF8 AVwA5ACgAOABGADIAYAAkADYAdQA+AHIAdwAoACEAdQBeAEQANABuAFAAdwBaACEATQA6AE0AVg BOAGQAUwBkACcAYQBeACAAOABfAGYAIABhADIAeQA3AEcATQA0AFgAVgBFAFwAQwBrAHoAAAAAA AUAAAAAAAAABAAAAEgATwBNAEUACQAAAAAAAAAIAAAAaABvAG0AZQAuAG4AZQB0AAkAAAAAAAA ACAAAAGgAbwBtAGUALgBuAGUAdAAEAAAAAQQAAAAAAAUVAAAAV4rrGerLNjixfdBQEwAAAAAAAAAT AAAAXABcAFYATQBBAEQAUwAwADIALgBoAG8AbQBlAC4AbgBlAHQAAAAAAAwAAAAAAAAADAAAAFw AXAAxADAALgAxADAALgAwAC4ANAAAAAkAAAAAAAAACQAAAGgAbwBtAGUALgBuAGUAdAAAAAAAC QAAAAAAAAAJAAAAaABvAG0AZQAuAG4AZQB0AAAAAAAJAAAAAAAAAAkAAABUAG8AdQBsAG8AdQB zAGUAAAAAAAkAAAAAAAAACQAAAFQAbwB1AGwAbwB1AHMAZQAAAAAAAAAAAA==
Then I prepare my unattend.xml file and I copy it in my $ParentFolder (don’t forget to copy the content of the odjblob file):
<?xml version='1.0' encoding='utf-8'?>
<unattend xmlns="urn:schemas-microsoft-com:unattend" xmlns:wcm="https://schemas.microsoft.com/WMIConfig/2002/State" xmlns:xsi="https://www.w3.org/2001/XMLSchema-instance">
    <settings pass="offlineServicing">
        <component name="Microsoft-Windows-UnattendedJoin" processorArchitecture="amd64" publicKeyToken="31bf3856ad364e35" language="neutral" versionScope="nonSxS">
            <OfflineIdentification>
                <Provisioning>
                    <AccountData>ARAIAMzMzMwwAwAAAAAAAAAAAgABAAAAAQAAAAQAAgABAAAAAQAAAAgDAAAIAAIACAMAAAEQCADMzMzM+AIAAAAAAADwZEKYcKZCmDCeQpigHUKYCAAKAGB6QpgQABIAcKtCmBAAEgCwp0KYPSWgj2mer06GzNIgAe4zfbClQpjA/kGYcKNCmAEAAAA9JaCPaZ6vTobM0iAB7jN9MKJCmLCdQpj88QDgsJ5CmLCrQpgAAAAACQAAAAAAAAAJAAAAaABvAG0AZQAuAG4AZQB0AAAAAAANAAAAAAAAAA0AAABOAGEAbgBvAFMAZQByAHYAZQByADAAMQAAAAAAeQAAAAAAAAB5AAAAUwBfADUALgBdACAAZwAnAEYALQB0AFQAOgAsADcAKgAlAEYANAAnADUAJwBPADgAdgBZACYAWAAqADoAJQAuAC4APAB3AEQAaABsAF4APwBEAGEAJQBIAHMAbgB5AEcAIQBVAEUATQBxACcATgByACEAMABbADsAUgA6AD8ARAAuAF8AVwA5ACgAOABGADIAYAAkADYAdQA+AHIAdwAoACEAdQBeAEQANABuAFAAdwBaACEATQA6AE0AVgBOAGQAUwBkACcAYQBeACAAOABfAGYAIABhADIAeQA3AEcATQA0AFgAVgBFAFwAQwBrAHoAAAAAAAUAAAAAAAAABAAAAEgATwBNAEUACQAAAAAAAAAIAAAAaABvAG0AZQAuAG4AZQB0AAkAAAAAAAAACAAAAGgAbwBtAGUALgBuAGUAdAAEAAAAAQQAAAAAAAUVAAAAV4rrGerLNjixfdBQEwAAAAAAAAATAAAAXABcAFYATQBBAEQAUwAwADIALgBoAG8AbQBlAC4AbgBlAHQAAAAAAAwAAAAAAAAADAAAAFwAXAAxADAALgAxADAALgAwAC4ANAAAAAkAAAAAAAAACQAAAGgAbwBtAGUALgBuAGUAdAAAAAAACQAAAAAAAAAJAAAAaABvAG0AZQAuAG4AZQB0AAAAAAAJAAAAAAAAAAkAAABUAG8AdQBsAG8AdQBzAGUAAAAAAAkAAAAAAAAACQAAAFQAbwB1AGwAbwB1AHMAZQAAAAAAAAAAAA==</AccountData>
                </Provisioning>
            </OfflineIdentification>
        </component>
    </settings>

    <settings pass="oobeSystem">
        <component name="Microsoft-Windows-Shell-Setup" processorArchitecture="amd64" publicKeyToken="31bf3856ad364e35" language="neutral" versionScope="nonSxS">
            <UserAccounts>
                <AdministratorPassword>
                    <Value>Password</Value>
                    <PlainText>true</PlainText>
                </AdministratorPassword>
            </UserAccounts>
            <TimeZone>Romance Standard Time</TimeZone>
        </component>
    </settings>

    <settings pass="specialize">
        <component name="Microsoft-Windows-Shell-Setup" processorArchitecture="amd64" publicKeyToken="31bf3856ad364e35" language="neutral" versionScope="nonSxS">
            <RegisteredOwner>Romain Serre</RegisteredOwner>
            <RegisteredOrganization>Tech-Coffee</RegisteredOrganization>
        </component>
    </settings>
</unattend>
To finish I integrate this unattend.xml file into my NanoServer.vhdx image by using this script:
$ParentFolder = "c:\temp\NanoPrep"
Set-Location $ParentFolder
dism\dism /Mount-Image /ImageFile:$($ParentFolder + "\VHDX\NanoServer.vhdx") /index:1 /MountDir:$($ParentFolder + "\MountDir")
dism\dism /image: $($ParentFolder + "\MountDir") /Apply-Unattend:$($ParentFolder + "\unattend.xml")
New-Item -Type Directory -Path $($ParentFolder + "\MountDir\windows\panther")
copy $($ParentFolder + "\unattend.xml") $($ParentFolder + "\MountDir\windows\panther")
dism\dism /Unmount-Image /Mountdir:$($ParentFolder + "\MountDir") /commit
Run commands on the first boot
It is possible to run some commands on the first boot of the Nano Server. It is very simple: just past all commands that you need in a SetupComplete.cmd file and next just copy it to the C:\Windows\Setup\Scripts folder of the image. Below you can find my SetupComplete.cmd:
netsh advfirewall set all state off
netsh interface ip set address "Ethernet" static 10.10.0.200 255.255.255.0 10.10.0.1
netsh interface ipv4 add dnsserver "Ethernet" address=10.10.0.5 index=1
ipconfig
This script disables the firewall (it’s for a lab J) and set the IP configuration on an Ethernet network interface. To finish the ipconfig is run to show me the good configuration of the Ethernet interface. Next I paste this file in $ParentFolder directory. To finish I run this script:
$ParentFolder = "c:\temp\NanoPrep"
Set-Location $ParentFolder
dism\dism /Mount-Image /ImageFile:$($ParentFolder + "\VHDX\NanoServer.vhdx") /index:1 /MountDir:$($ParentFolder + "\MountDir")
New-Item -Type Directory -Path $($ParentFolder + "\MountDir\windows\Setup\Scripts")
Copy-Item $($ParentFolder + "\SetupComplete.cmd") $($ParentFolder + "\MountDir\windows\Setup\Scripts")
dism\dism /Unmount-Image /Mountdir:$($ParentFolder + "\MountDir") /commit
Add drivers to the image
If your hardware is not recognized and you need specific drivers, you can use the below script to add drivers to the NanoServer.vhdx. Just set the $MyDriversPath variable by the path where are located your drivers.
dism\dism /Mount-Image /ImageFile:$($ParentFolder + "\VHDX\NanoServer.vhdx") /index:1 /MountDir:$($ParentFolder + "\MountDir")
dism\dism /Add-Driver /image:$($ParentFolder + "\MountDir") /driver: $MyDriversPath
dism\dism /Unmount-Image /Mountdir:$($ParentFolder + "\MountDir") /commit
Deploy NanoServer Virtual Machine
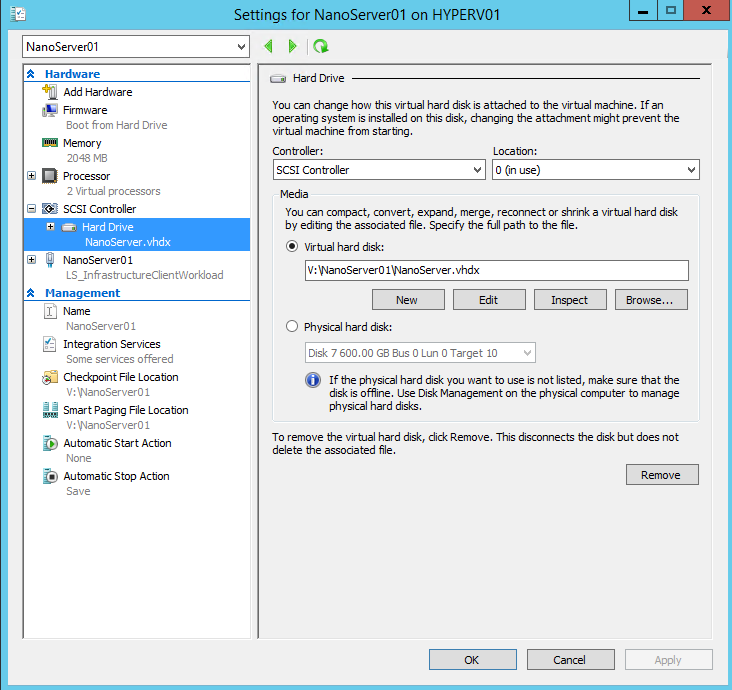
So I have created a Virtual Machine in Hyper-V and I have selected the NanoServer.vhdx disk.
Once the machine is deployed, just specify enter-pssesion –ComputerName NanoServer01

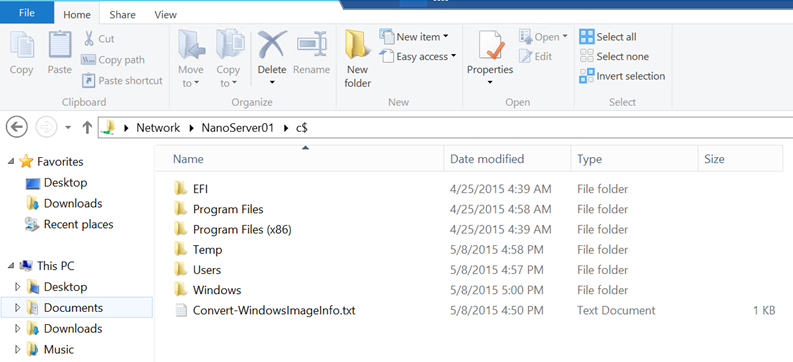
As you can see above, we are connected to the NanoServer remotely. You can also connect to the server by using Windows Explorer:
And you can use MMC as Event Viewer remotely:

Now that we have access to the server remotely, we can create cluster, configure Hyper-V and so on. But don’t expect to manage the server as before. There is no console installed locally and there is no local logins supportJ.
To finish, let’s talk about the footprint. As you can see below, the footprint of the Nano Server is really small. The VHDX file size is only 988 MB!


