This part covers the SQL Server installation and configuration for a SCCM 2012 R2 environment.
SQL server will be installed on a dedicated server. (If SQL server is installed on the same server as the SCCM Primary Site, some steps are not necessary)
Server: M-SQL1
Article Parts:
- Part 1: SCCM 2012 R2 Environment Preparation / Requirements
- Part 2: SCCM 2012 R2 SQL Server Installation-Configuration
- Part 3: SCCM 2012 R2 Primary Site Installation
Preparation
Components required
| Windows Feature/Role: |
|
| SQL Server Components: |
Version: 2012 ENT SP1 CU7 x64 |
Storage Requirement
| Disk | Letter | Size | Name | SQL Path | Description |
| disk0 | c: | 25GB | System | C:\Program Files\Microsoft SQL Server\ C:\Program Files (x86) \Microsoft SQL Server\ C:\MSSQL\MSSQL11.<instancename>\ C:\MSSQL\MSSQL11.<instancename>\MSSQL\Data C:\MSSQL\MSRS11.<instancename>\ |
SQL Shared Features SQL Shared Features SQL Server Directory System Databases Reporting Service |
| disk1 | E: | 10 GB | SQL_DB | E:\MSSQL\MSSQL11.<instancename>\MSSQL\Data E:\MSSQL\MSSQL11.<instancename>\MSSQL\TempDB\Data E:\MSSQL\MSSQL11.<instancename>\MSSQL\Backup |
Databases TempDB Database Database Backups |
| disk1 | F: | 8 GB | SQL_LOG | F:\MSSQL\MSSQL11.<instancename>\MSSQL\Log F:\MSSQL\MSSQL11.<instancename>\MSSQL\TempDB\Log |
DB Transaction Log TempDB Transaction Log |
Note [Production]:
- Disk Sizes are for a Lab environment.
- For Production it is recommended to add:
- 1x “BIN” disk for “SQL Server”, “System DB” and “Reporting Service” data.
- 1x “TEMPDB” disk for TempDB Database and Log.
- 1x “BIN” disk for “SQL Server”, “System DB” and “Reporting Service” data.
Service Accounts
- Create accounts and groups
| Service | Type | Account | Description |
| SQL | Group | lab1.ad\SCCMSQLAdmins | SQL Administrators Group |
| SQL | User | lab1.ad\svc-sqldbe | SQL DBE Service Account (not administrator of server) |
| SQL | User | lab1.ad\svc-sqlagt | SQL Agent Service Account (not administrator of server) |
| SQL | User | lab1.ad\svc-sqlssrs | SQL SSRS Service Account (not administrator of server) |
Note [Production]: You can use MSA accounts for Database Engine and Agent Services
- Add your account to the SCCMSQLAdmins group
- Add SCCMSQLAdmins group to Local Administrators of M-SQL1 server
Prerequisites
Remote Registry:
Check if “Remote Registry” service is set to Automatic startup and started (*):

(*) required by SCCM if SQL is installed on a remote Server.
Install .NET 3.5 features:
Install-WindowsFeature NET-Framework-Core -Source V:\sources\sxs
Download the last Cummulative update for SQL Server: https://support.microsoft.com/kb/2772858/en-us Copy it on the SQL Server (e:\CU)
SQL Server – Installation
Launch a CMD (as Administrator), start setup from DVD drive (with CU included):
| Setup.exe /Action=Install /UpdateEnabled=TRUE /UpdateSource=“E:\CU” |

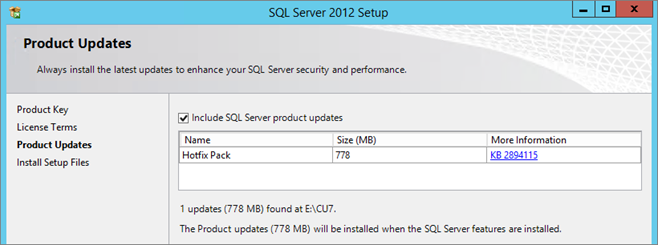
Select “SQL Server Feature Installation”:

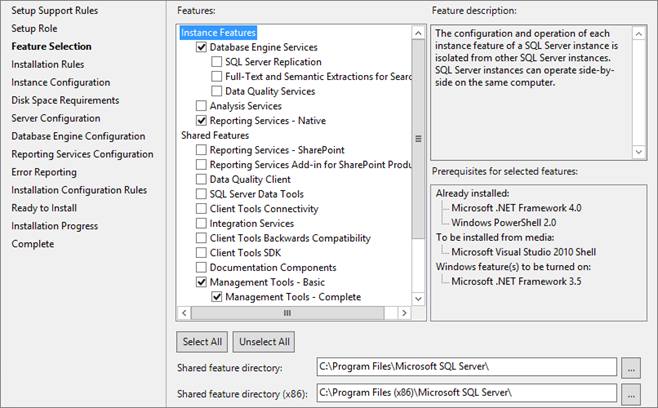
Select features:
Select “Named instance” and enter a Name:
Note: You can add a “BIN” disk for instance root directory.

Required space:

Enter services account and configure Startup Type:
For security reason, it’s not recommended to enable Browser Service (but it’s required with SCCM if you want to change the instance port, see “SQL Design Note /Requirement” chapter)

Select collation: SQL_Latin1_General_CP1_CI_AS

Configure your Security option (it’s recommended to keep the “sa” account as a lifeboat account, but you have to rename it): 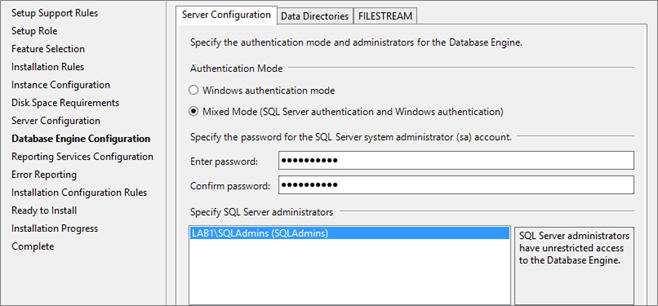
Enter your path:

On the SSRS page, select “Install and configure”:
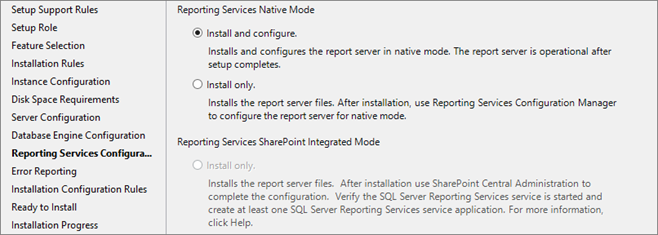
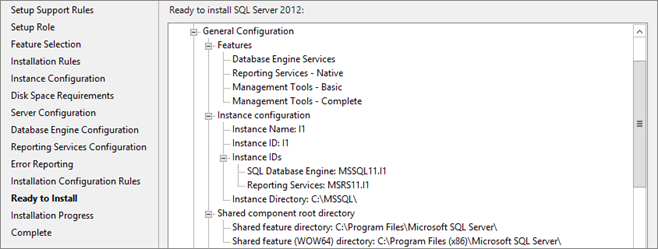
Start the installation:
Check SSRS configuration
You can check Reporting DB creation:

From « Reporting Configuration Manager », service account:

Web Service Configuration:
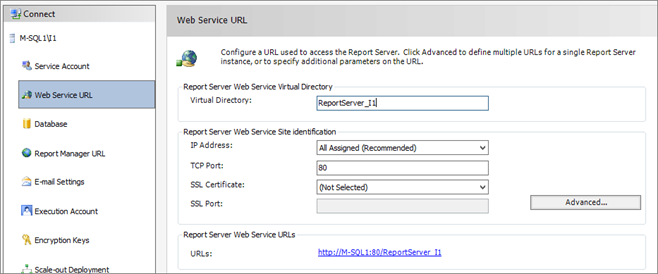
Test it:

Report Manager URL Configuration:

Test it:

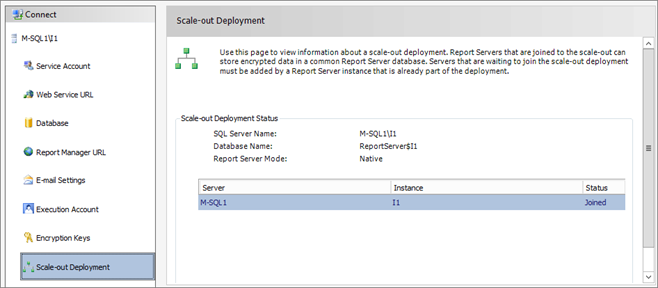
Status must be “Joined”:
SQL Configuration
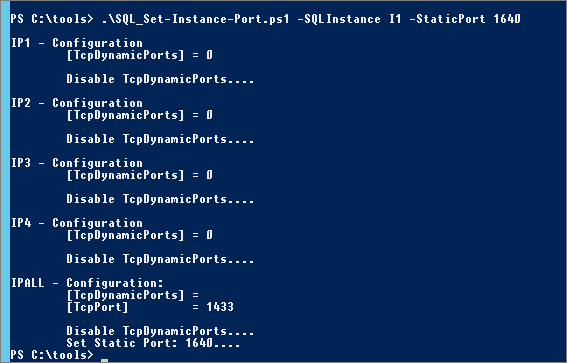
Configure Instance Port
Use Script: SQL_Set-Instance-Port.ps1
Start a PowerShell console (as Administrator) and run:
SQL_Set-Instance-Port.ps1 -SQLInstance <instancename> – StaticPort <yourport>
Check Configuration:
Use Script: SQL_Get-Instance-Network.ps1
Note: “TcpDynamicPorts” column must be empty (if there is a 0, you have to remove it)
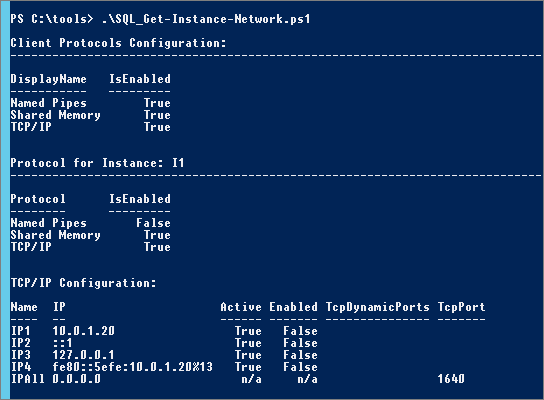
Restart instance and check services:

Set SPN
To use Kerberos authentication (in place of NTLM), a SPN must be created. Register SPN for the SQL Domain Service Account:
| setspn -A MSSQLSvc/M-SQL1:1640 lab1.ad\svc-sqldbesetspn -A MSSQLSvc/m-sql1.lab1.ad:1640 lab1.ad\svc-sqldbeSyntax:setspn -A MSSQLSvc/<ServerName><InstancePort> <domain>\<sqlserviceaccount>
setspn -A MSSQLSvc/<ServerFQDN><InstancePort> <domain>\<sqlserviceaccount> |
Check:
| setspn -L lab1.ad\svc-sqldbeNote – Delete a SPN:setspn -D MSSQLSvc/<ServerName><InstancePort> <domain>\<sqlserviceaccount> |

TIPS: Check Authentication mode from SQL:
SELECT net_transport, auth_scheme
FROM sys.dm_exec_connections
WHERE session_id = @@SPID;
-- Example to check SCCM connection:
SELECT session_id, net_transport, auth_scheme,encrypt_option, client_net_address,
client_tcp_port, local_tcp_port
FROM sys.dm_exec_connections
WHERE client_net_address = '10.0.1.10'

Configure Firewall
Use Script: FW_Create-SQLRules.ps1
This script creates incoming rules for SQL Instance, SQL Browser and SQL Broker services.
Edit the script and change the Instance port (1640 in this example).

NOTE for SCCM Installation:
These rules are not sufficient to install SCCM. The setup will fail to join the Remote SQL Server. It is also necessary to open additional Ports:
Use Script: FW_Create-SQLRules-AdditionalSCCM.ps1
Note: These ports are required only for installation, so you have two options:
- Disable SQL Server firewall during SCCM installation
- Open ports with the script bellow, install SCCM and disable rules after.

Configure rights for SCCM Server on SQL Server
This Step must be done if SQL Server is installed on a Remote Server.
The SCCM server computer account needs “sysadmin” rights on the SQL Server
On SQL Server, it’s impossible to add a computer accounts as logins. So the solution is to create a group with the SCCM computer account and add SQL rights to this group.
On the SQL Server, create a local group “SCCMServers” and add the SCCM Server account:
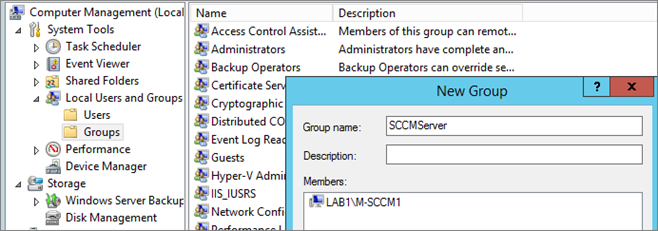
From Management Studio, create a new login with this group and add “sysadmin” right.
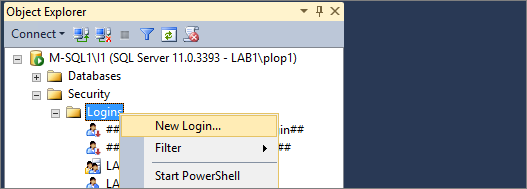
Select the local group created before:

Give the “sysadmin” Server role:
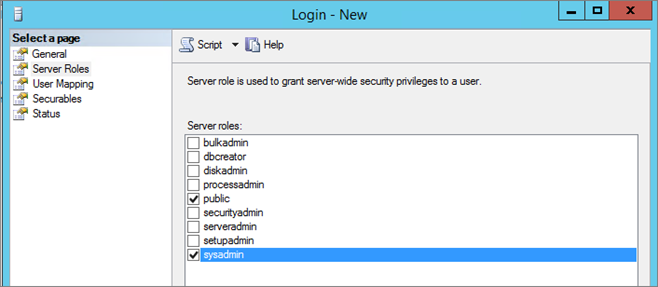
Close Management Studio.
Administrators Right:
Add the SCCM Server computer account to the local “Administrators” group on the SQL Server:
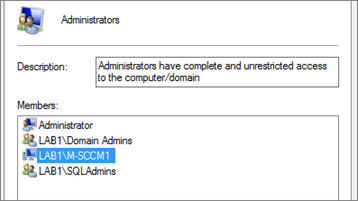
Else there is a failed during install checks:


