By default, Windows Azure Pack provides an Authentication site for tenants. This authentication site can be replaced by an AD Federation Service (AD FS) to allow tenants to log on Windows Azure Pack portal with their own Active Directory credential. Below there is an example of how to authenticate tenants with AD FS:

Fabrikam and Contoso forests represent two customers of my Cloud service. When a tenant from Fabrikam want to log on the WAP Tenant portal (www.dmzhome.net), here’s what happens:
- The user from Fabrikam connects to www.dmzhome.net;
- He is redirected to sts.dmzhome.net. This AD FS asks where come from the tenant (Microsoft Azure, Fabrikam or Contoso);
- When the tenant has selected where he come from, he is redirected to the Fabrikam account AD FS (fs01.fabrikam.com);
- The tenant specifies his credential and fs01.fabrikam.com send claims to sts.dmzhome.net;
- sts.dmzhome.net verifies the claims and redirect the token to www.dmzhome.net;
- If the tenant doesn’t exist in the Windows Azure Pack database, an account is created.
In this topic, I will configure each AD FS to authenticate tenants with their own Active Directory credential on Windows Azure Pack tenant portal.
Requirements
To follow this topic, you need:
- Three forests to simulate Fabrikam, Constoso and HomeCloud Active Directory;
- One server that hosts Active Directory Federation Service in each forest (fresh installation);
- A working Windows Azure Pack installation (cf. this topic).
Add a relying party trust to Account AD FS
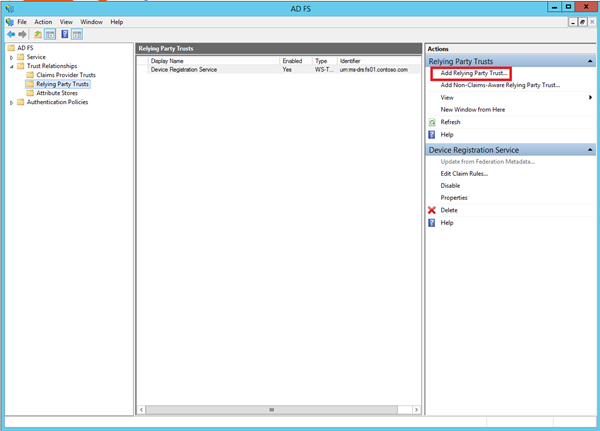
First we will configure the account AD FS that are in each customer forest (Fabrikam and Contoso). So open the AD FS console and navigate to Relying Party Trusts. Select Add Relying Party Trust…:
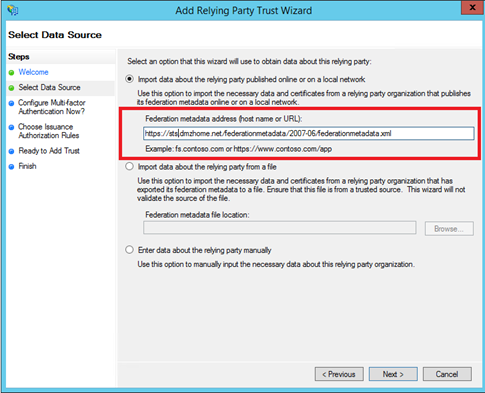
Next specify the Federation Metadata address of the resource AD FS. Mine is called sts.dmzhome.net so I specify https://sts.dmzhome.net/federationmetadata/2007-06/federationmetadata.xml:
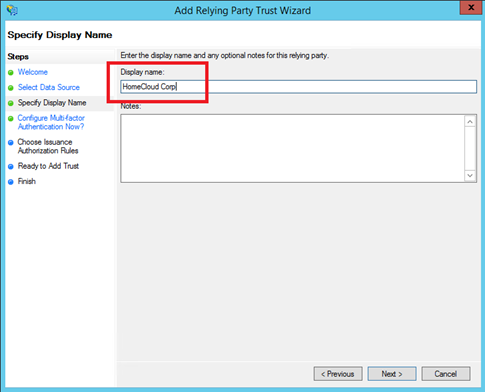
Next specify a Display Name:
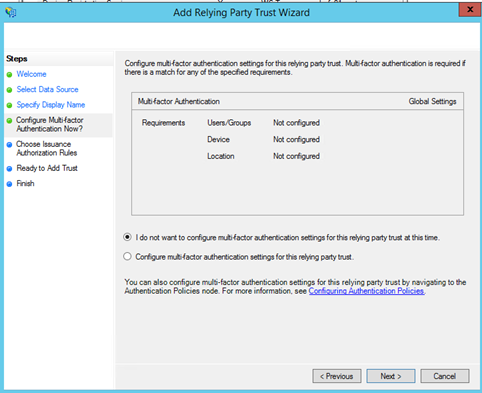
In this topic I don’t configure the Multi-Factor authentication. So I leave the defaut settings and I click on next.
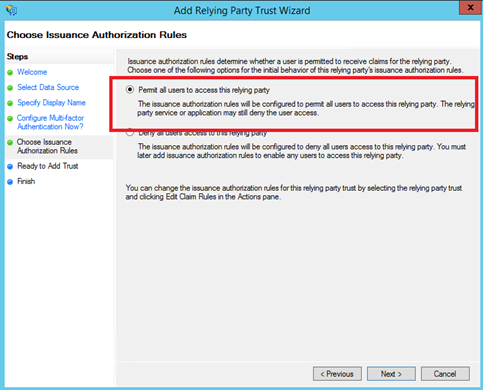
Leave the default setting on the below screen to permit all users to access this relying party.
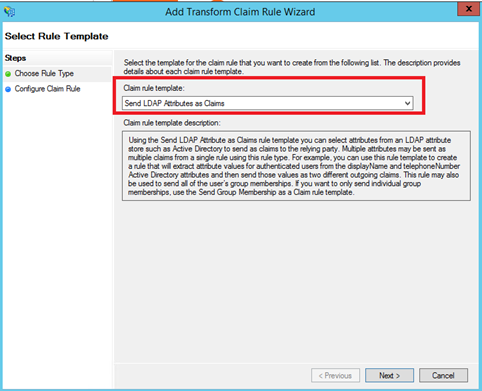
When you are on Finish screen, tick the edit claims rules checkbox. Click on Add Rule in Issuance Transform Rules tab. Select Send LDAP Attributes as Claims:
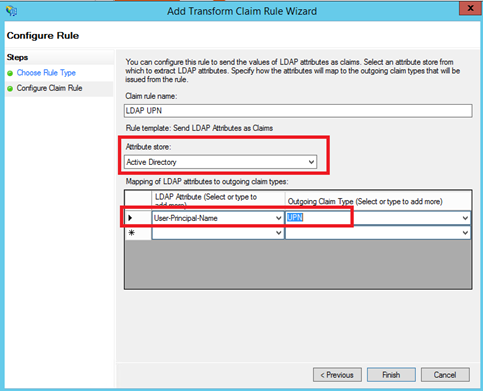
Next specify a Claim rule name and select Active Directory as Attribute store. Map User-Principal-Name LDAP attribute to UPN claim type:
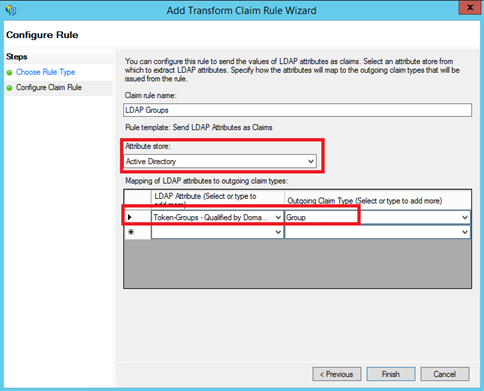
Next add again a rule based on Send LDAP Attributes as Claims template. Specify a claim rule name and select Active Directory as Attribute store. Map Token-Groups – Qualified by Domain Name LDAP attribute to Group claim type:
Next add again a rule and select Pass Through or Filter an Incoming Claim template:
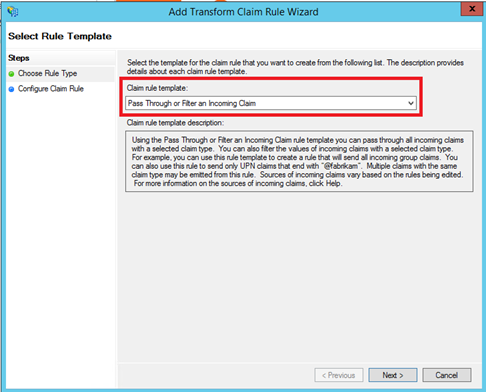
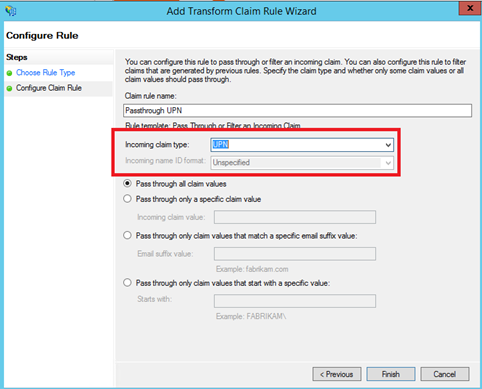
Specify a claim rule name and select UPN in Incoming claim type menu:
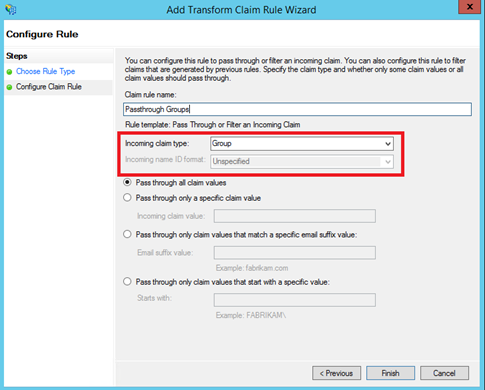
Then add again a rule and select Pass Through or Filter an Incoming Claim template. Specify a claim rule name and select Group in Incoming claim type menu:
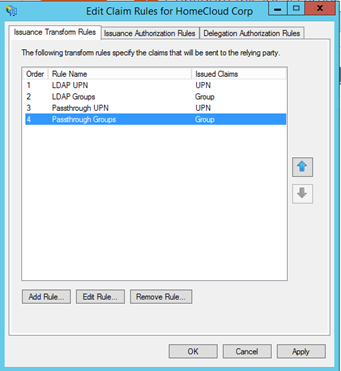
At the end you should have four transform rules as below:
Repeat the same procedure for the others Account AD FS.
Add claims Provider Trusts to Resource AD FS
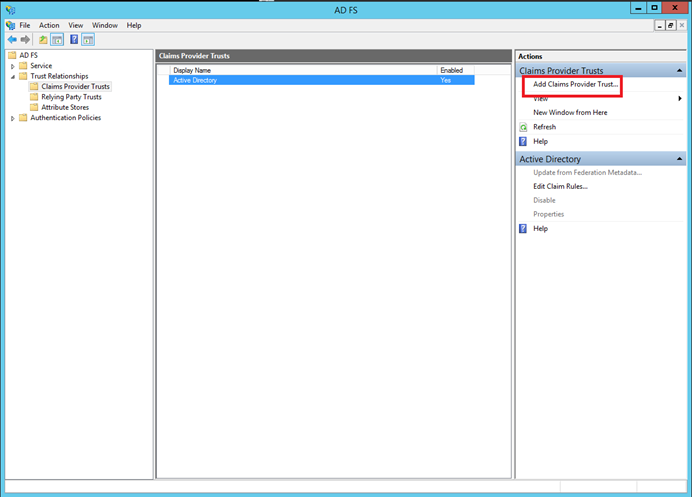
Now that Account AD FS are set, we have to configure the resource AD FS in our perimeter to add claims provider trusts. In other word, this configuration enables to create federation trust From Resource AD FS to Account AD FS. In the below example, I create a federation trust with Fabrikam. First open the AD FS console and navigate to Claims Provider Trusts. Click on Add Claims Provider Trust…:
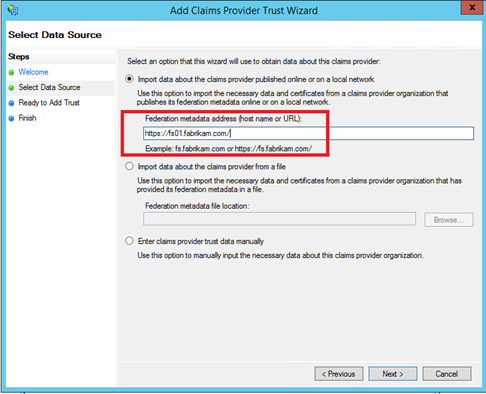
Next specify the account AD FS url in Federation metadata address field. In my example I specify https://fs01.fabrikam.com/.
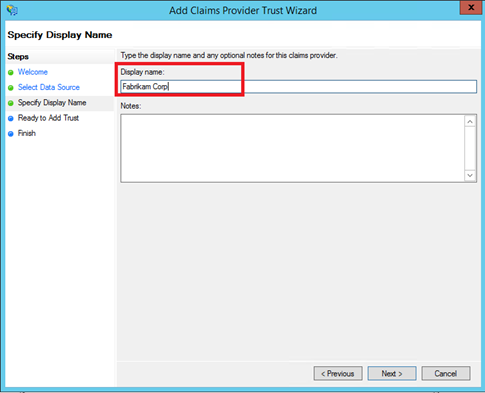
Then specify a display name.
Once the Claims Provider Trust is created, edit the claim rules of this trust. Click on Add rule.
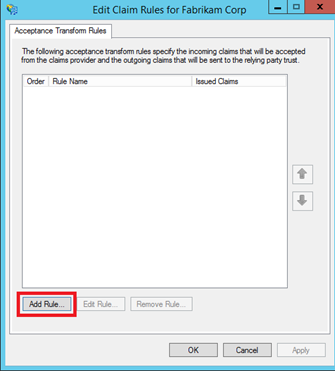
Select Send LDAP Attributes as Claims template.
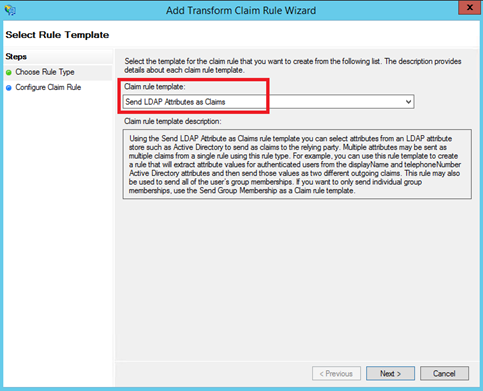
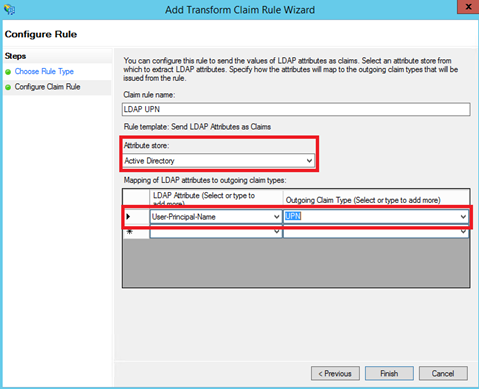
Next specify a Claim rule name and select Active Directory as Attribute store. Map User-Principal-Name LDAP attribute to UPN claim type:
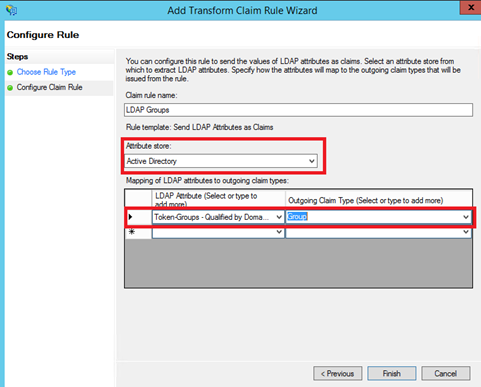
Next add again a rule based on Send LDAP Attributes as Claims template. Specify a claim rule name and select Active Directory as Attribute store. Map Token-Groups – Qualified by Domain Name LDAP attribute to Group claim type:
Next add again a rule and select Pass Through or Filter an Incoming Claim template:
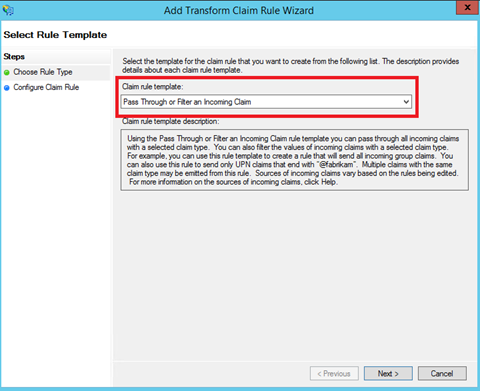
Specify a claim rule name and select UPN in Incoming claim type menu:
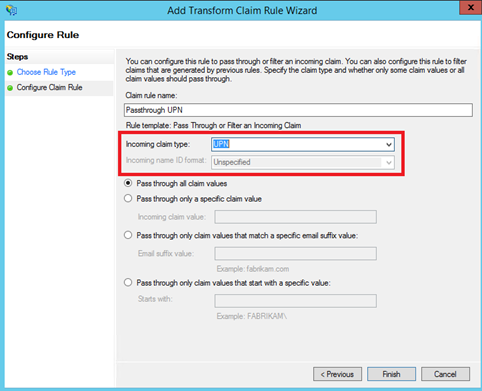
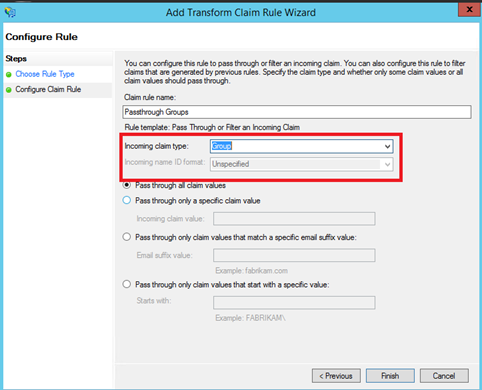
Then add again a rule and select Pass Through or Filter an Incoming Claim template. Specify a claim rule name and select Group in Incoming claim type menu:
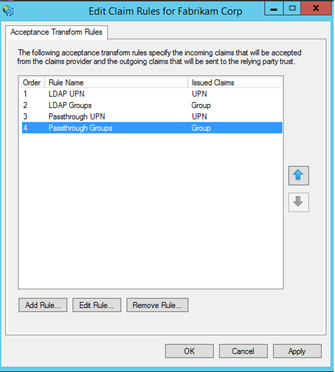
At the end you should have four transform rules as below:
Repeat the same procedure to add a Claims Provider Trust to Contoso.
Add a relying party trust to Resource AD FS
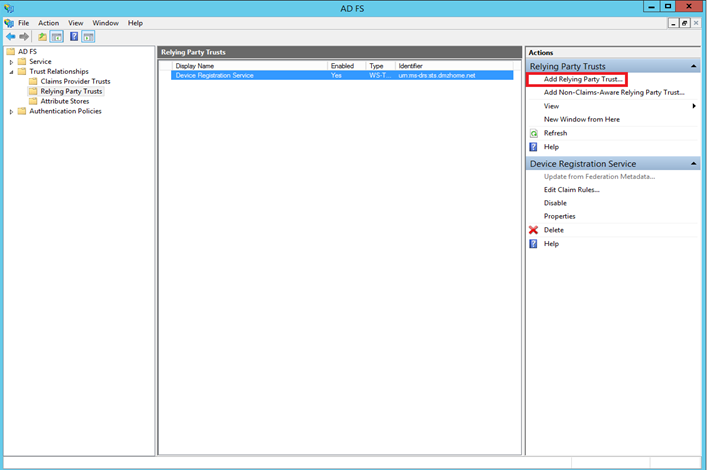
Next we have to add a relying party trust to the Windows Azure Pack tenant portal. So open the AD FS console and navigate to Relying Party Trusts. Then click on Add Relying Party Trust…:
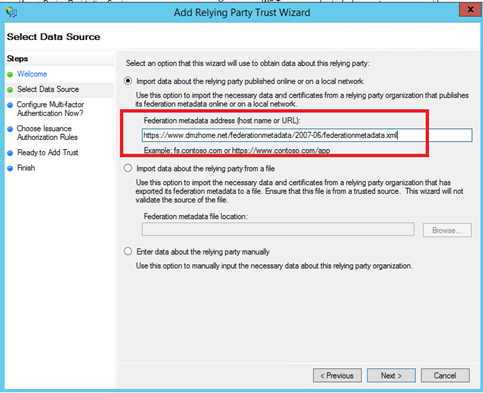
Specify the federation metadata address of the Windows Azure Pack tenant portal. In my example I have specified https://www.dmzhome.net/federationmetadata/2007-06/federationmetadata.xml.
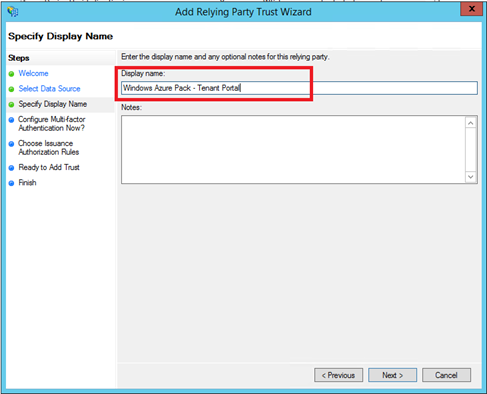
Next specify a display name.
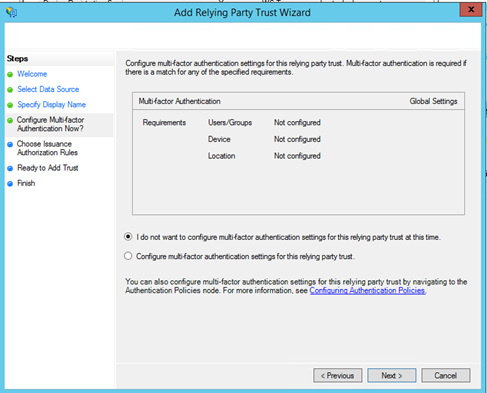
Next I leave the default settings because I don’t want to configure the Multi-Factor Authentication.
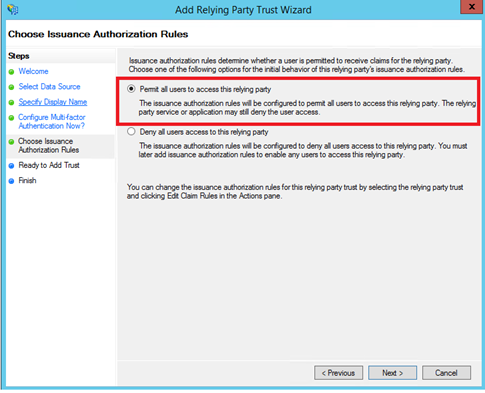
Then leave the default setting to permit all users to access this relying party.
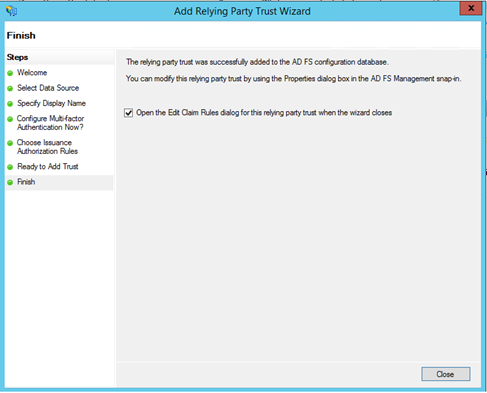
On the finish screen, tick the checkbox to edit claim rules.
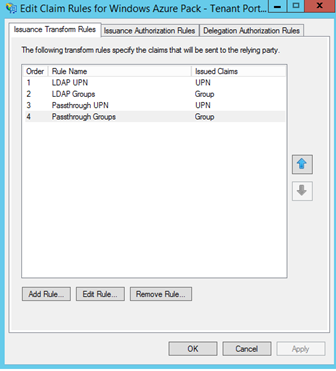
Add issuance transform rules as previous parts. You should have four rules as below.
To finish, run this command on the resource AD FS:
Set-AdfsRelyingPartyTrust -TargetIdentifier 'https://azureservices/TenantSite' -EnableJWT $true
The AD FS configuration is now finished J.
Change WAP Tenant authentication site
Now connect to a Windows Azure Pack server and run the below script. It enables to reconfigure Windows Azure Pack to use the resource AD FS as authentication site instead of the default site.
$fqdn = 'sts.dmzhome.net'
$dbServer = 'SQLAAG02.home.net'
$dbPassword = 'password'
$portalConfigStoreConnectionString = [string]::Format('Data Source={0};Initial Catalog=Microsoft.MgmtSvc.PortalConfigStore;User ID=sa;Password={1}', $dbServer, $dbPassword)
Set-MgmtSvcRelyingPartySettings -Target Tenant `
                                -MetadataEndpoint https://$fqdn/FederationMetadata/2007-06/FederationMetadata.xml `
                                -ConnectionString $portalConfigStoreConnectionString
Authenticate tenants with AD FS
Now we can open a browser and navigate to the tenant portal (https://www.dmzhome.net on my side). On the below screen you can see the authentication portal. The both AD FS appears and the tenants have to select the company (Fabrikam or Contoso).
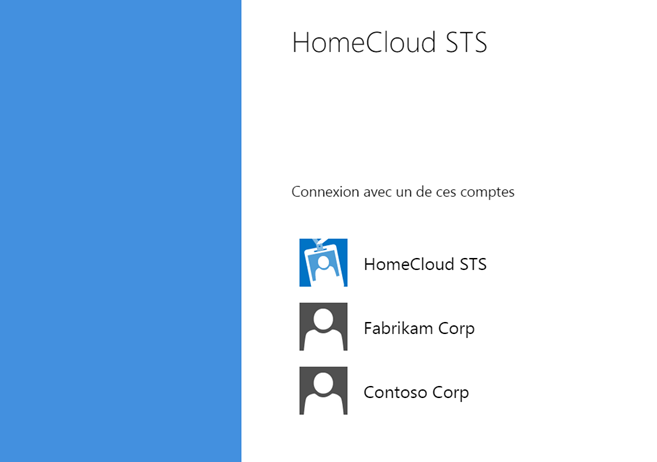
When the company is selected, the resource AD FS redirects the tenants to the related account AD FS.
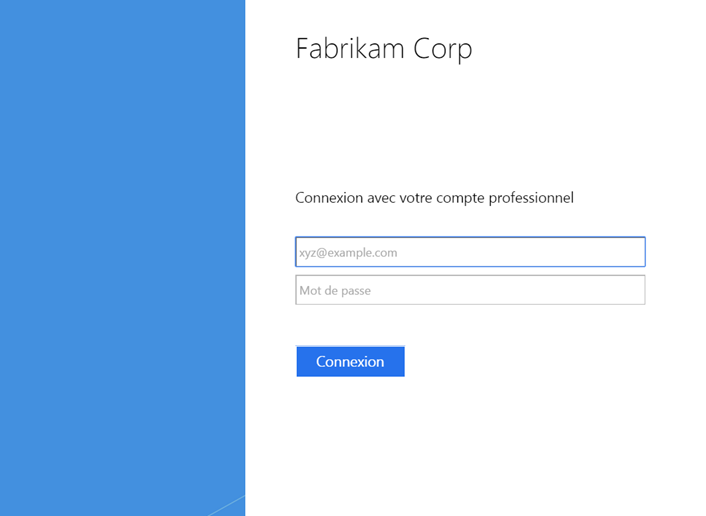
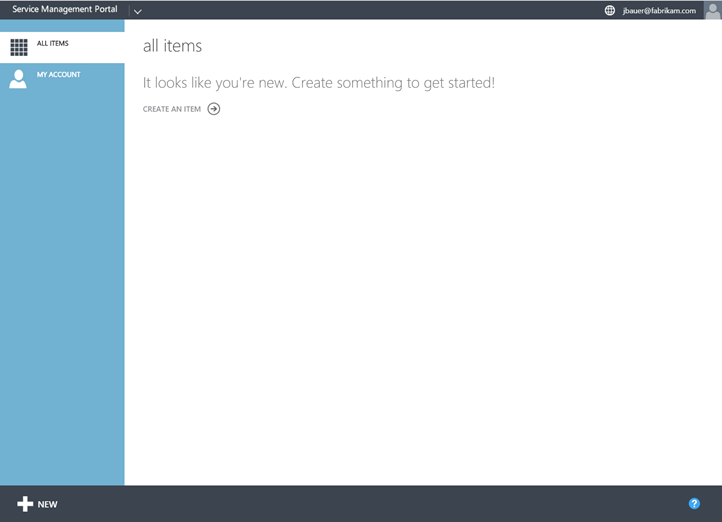
Once the tenant has specified his credential, he is redirected to the resource AD FS and then this last redirects the tenant to the WAP tenant portal. If the account doesn’t exist, he is created.
Customize AD FS authentication page
Thanks to AD FS, it is possible to customize the authentication page. You can use below PowerShell commands:
Set-AdfsGlobalWebContent -CompanyName "HomeCloud"
Set-AdfsGlobalWebContent -ErrorPageSupportEmail "Report this error"
Set-AdfsGlobalWebContent -ErrorPageDescriptionText "Access Denied"
Set-AdfsGlobalWebContent -Homelink "//www.tech-coffee.net"
Set-AdfsGlobalWebContent -HomelinkText "Website"
Set-AdfsGlobalWebContent -PrivacyLink "//www.tech-coffee.net"
Set-AdfsGlobalWebContent -PrivacyLinkText "Privacy Statement"
Set-AdfsWebTheme -TargetName default -Logo @{path="C:\Temp\homecloud.png"}
Set-AdfsWebTheme -TargetName default -Illustration @{path="C:\Temp\Cloud-Computing.jpg"}
Set-AdfsGlobalWebContent -SignInPageDescriptionText "<p>Welcome to HomeCloud service. Enjoy <span style="font-family: Wingdings;">J</span>.</p>"
Set-AdfsGlobalWebContent -ErrorPageDeviceAuthenticationErrorMessage "We were unable to authenticate you. EAre you sure that you have authorization to access the service ?"
Set-AdfsGlobalWebContent -ErrorPageGenericErrorMessage "An unexpected error has occurred, please let the administrators know"
Set-AdfsGlobalWebContent -ErrorPageAuthorizationErrorMessage “Sorry, we were unable to authorize your access, please try again. If this error persists, please contact the administrators.”
And the result J:

So as we have seen on this topic, it is possible to manage which customers access the service thanks to the federation trusts. By removing the federation trust, the customers can no longer access to the Cloud service. Enjoy with yours AD FS J.


hi Romain, thanks for post!
I’m also trying to publish AzurePack via Web Application Proxy, but it doesn’t load part of the contents.
Could you please advice which URLs should I publish through Web Application Proxy?
Thanks in advance.
Turned out to be issue with Web Application Proxy 2019.
By default it had HTTP/2 enabled which caused issues to load AzurePack and also Exchange OWA websites.
Adding following registry key solved the problem (need to restart Web Application Proxy service afterwards):
HKEY_LOCAL_MACHINE\SOFTWARE\Microsoft\Windows\CurrentVersion\Internet Settings\WinHttp\EnableDefaultHttp2 Value: 0